Intro
In this article, I demonstrate how to save images from a Power App to Azure Blob Storage and subsequently reference those images from a SQL Server data source. I have developed a Power App designed for product testing, which includes capturing an image as part of the test process. You can also catch the video I did on the subject below.
Product Test App
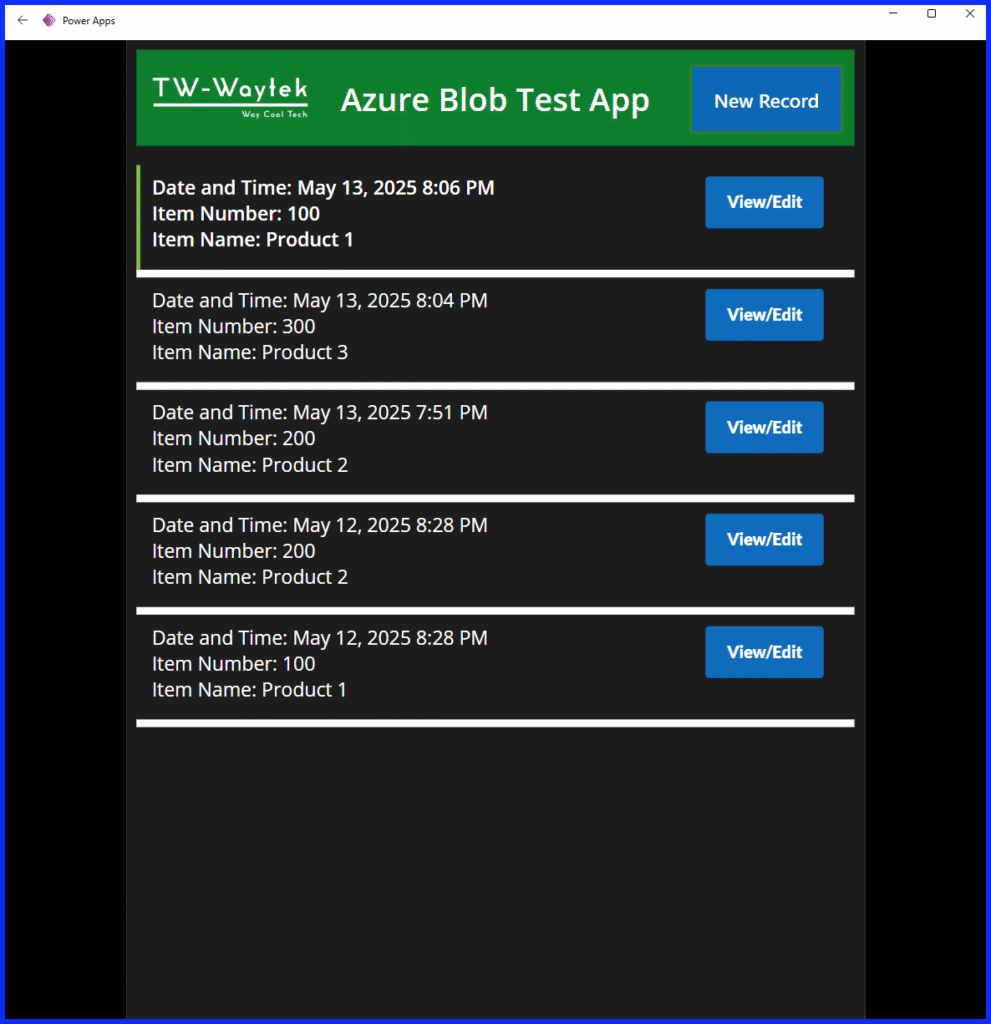
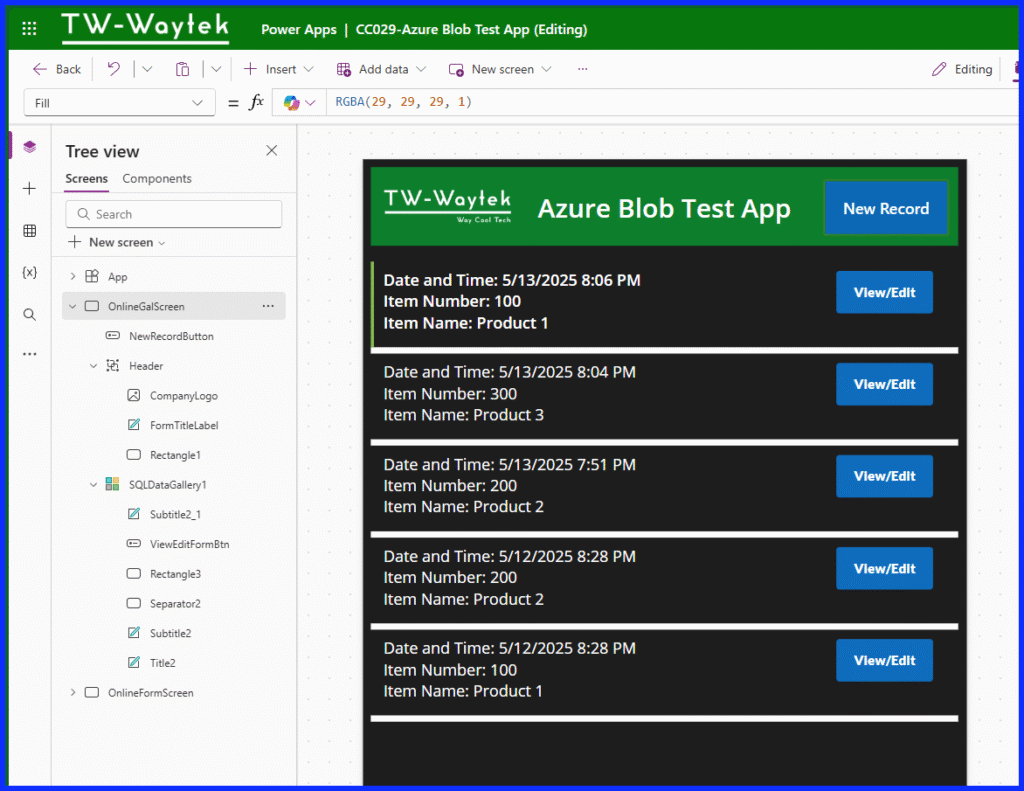
The product testing application features a gallery screen and a form screen. Below is the production version of the gallery screen.
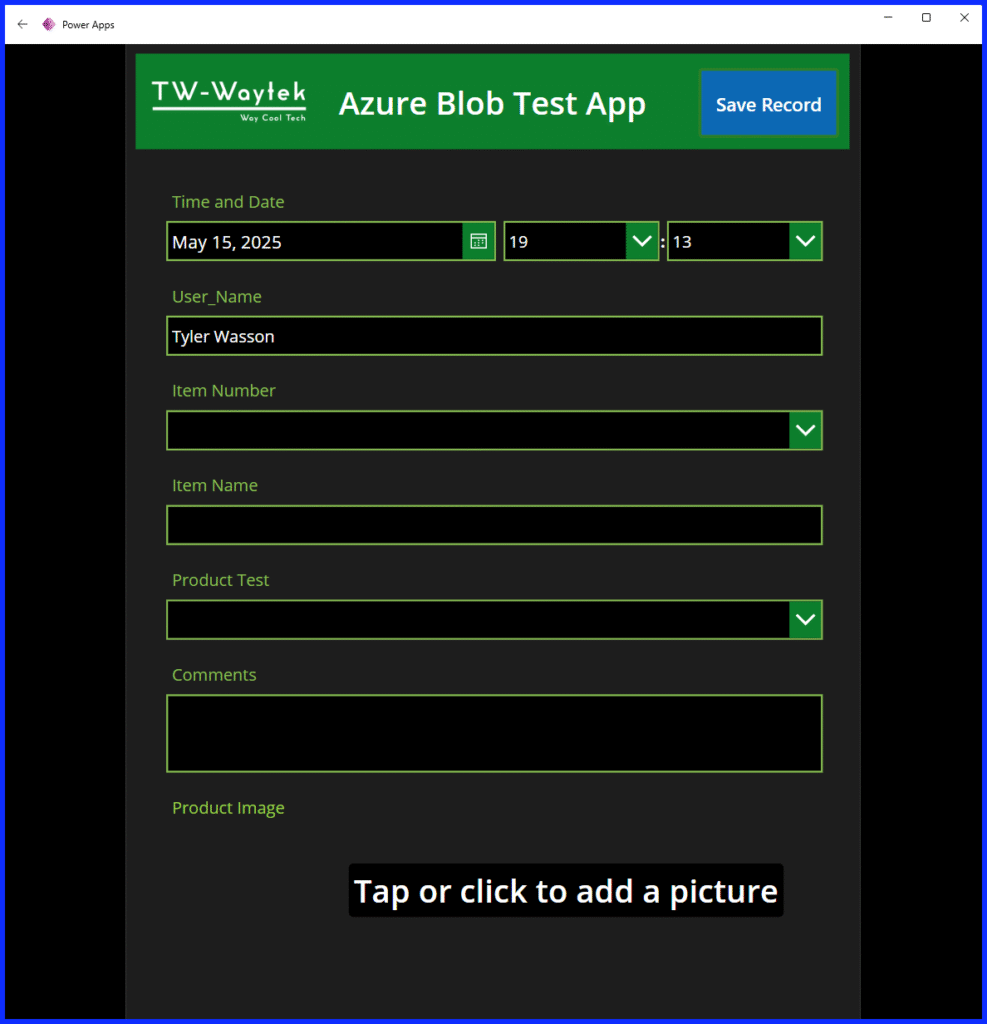
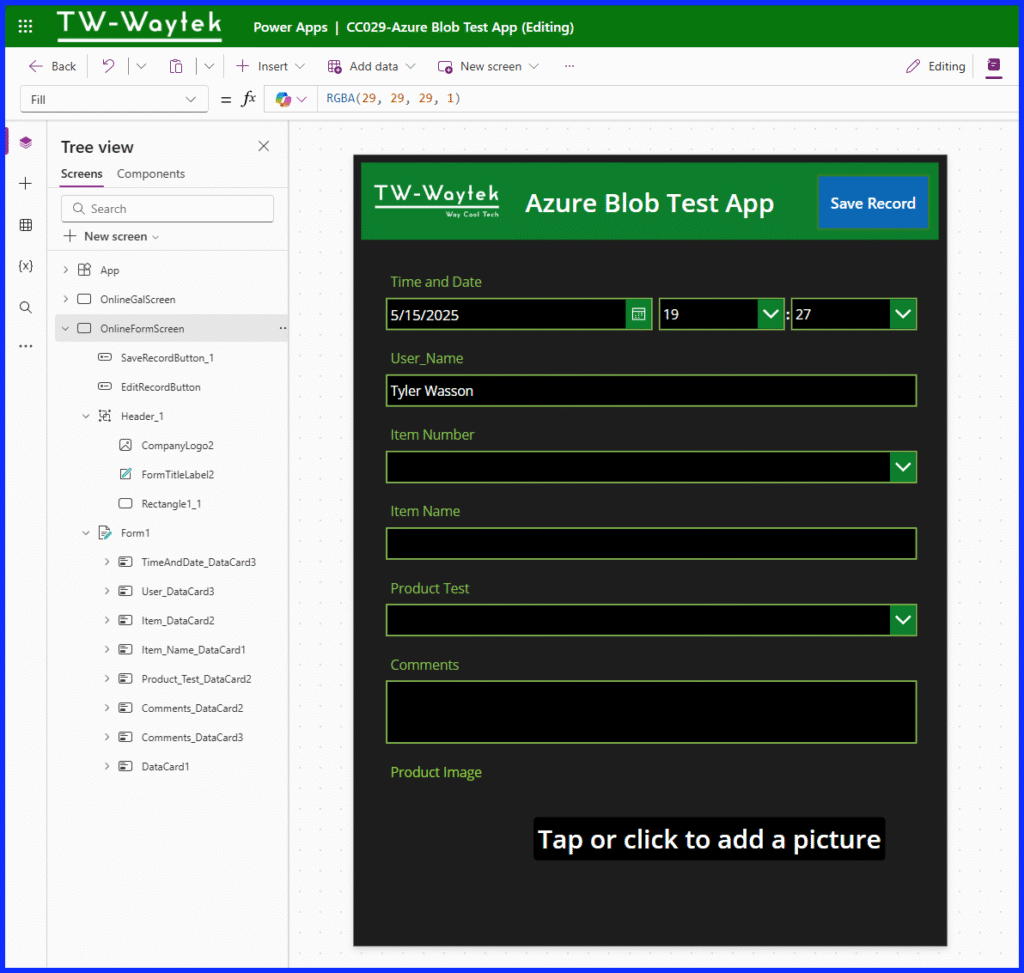
Here is the production version of the Form Screen without data.
Next is a selected item from the gallery screen fully filled out.

The SQL Database
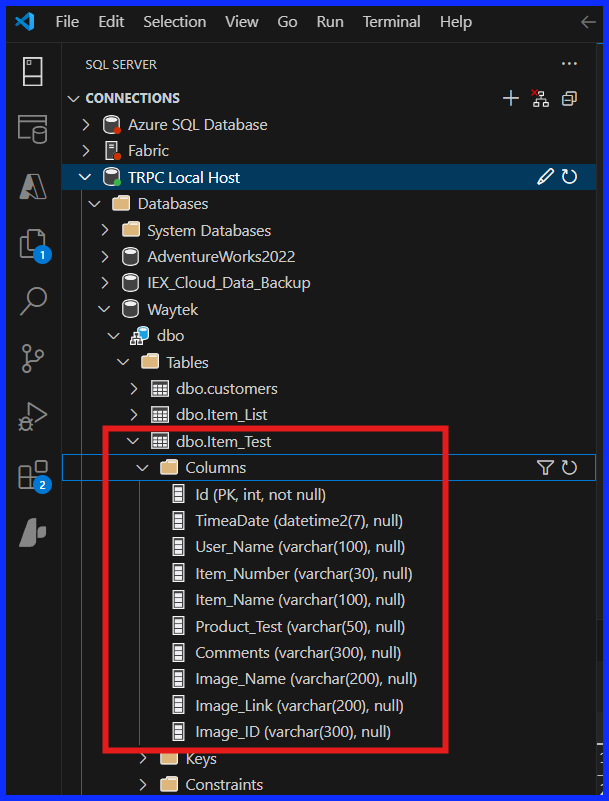
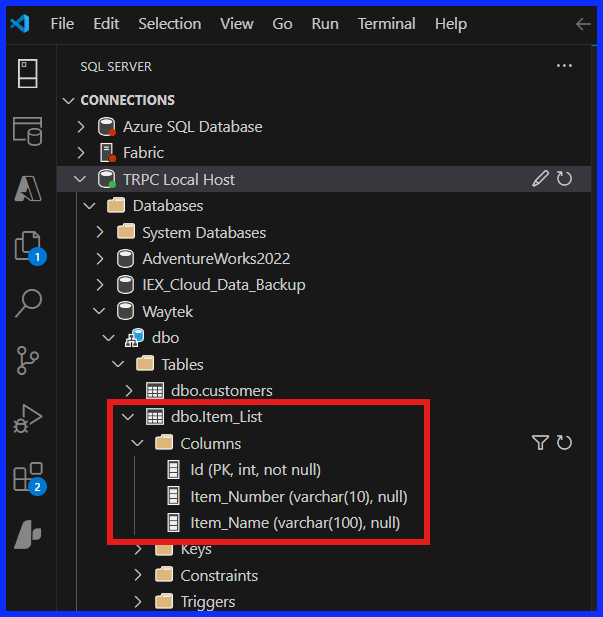
I created two tables: Item_Test and Items. Below are screenshots of each table with their columns and data types.
In the Item_Test table, the last three columns store metadata for images in Azure Blob Storage. Image_Name stores the image name, Image_Link contains the Azure Blob URL, and Image_ID holds the Azure Blob image ID.
These columns are required to manage images in Azure Blob from Power Apps.
OnlineGalScreen Buttons and Components:
The gallery screen consists of a header, a new record button and the gallery. The gallery has a label for the date and time, item number and item name. There is also a view and edit button for each line item in the gallery. Below are details for each component.
The New Record Button OnSelect: ResetForm(Form1); Navigate(OnlineFormScreen);
Date and Time Label: Concatenate(“Date and Time: “, ThisItem.TimeaDate)
Item Number Label: Concatenate(“Item Number: “, ThisItem.Item_Number)
Item Name Label: Concatenate(“Item Name: “, ThisItem.Item_Name)
The View/Edit Record Button OnSelect: ViewForm(Form1); Navigate(OnlineFormScreen);
OnlineFormScreen Buttons and Components:
The form screen is composed of a header, a save record button, an edit record button and a form component. The form component contains multiple data cards which include the following: date and time, user name, item number, item name, product test, comments, and product image. Detailed descriptions for each component are listed below.
Date, Default Date: If(Form1.Mode=FormMode.New,Today(),ThisItem.TimeaDate)
Hour, Default: If(Form1.Mode<>FormMode.View,Text(Hour(Now()),”[$-en-US]00″),Text(Hour(ThisItem.TimeaDate),”[$-en-US]00″))
Minute, Default: If(Form1.Mode<>FormMode.View,Text(Minute(Now()),”[$-en-US]00″),Text(Minute(ThisItem.TimeaDate),”[$-en-US]00″))
User Name, Default: If(Form1.Mode=FormMode.New, User().FullName, ThisItem.User_Name)
Item Number, Items: Item_List (table)
Item Name, Default: DataCardValue6.Selected.Item_Name
Product Test, Items: [“”, “Pass”, “Fail”]
Comments: Multi-line form component
The product image form component and the save record button are discussed further down in the post.
Azure Blob Storage Account
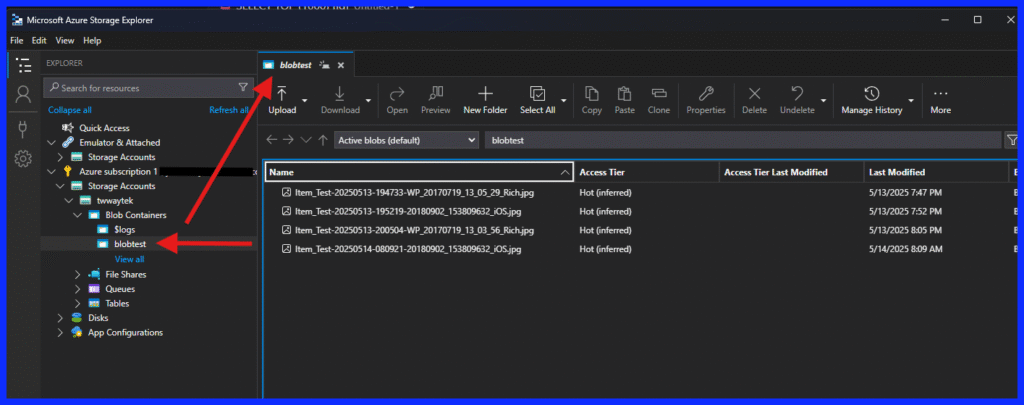
I connect to my Azure account via Microsoft Entra ID. This allows me to easily connect to any resource within my subscription using my M365 login account. After my blob storage account was setup, I manage it using Microsoft Azure Storage Explorer which you can download here if you’ve never used it before.
Below you can see I created a storage account called twwaytek and created a blob container called blobtest. I currently have four images saved in the container.
After setting up your Blob Storage account, connect it to your Power Apps account. In the Power Apps Studio, navigate to Connections from the left side menu, select new connection, and search for Blob Storage. Use Entra ID to access the Blob Storage account or however your Azure account is set up. Another convenient way to connect your Blob account from Power Apps is to connect via your account name and key. Click here to see more information on the Azure Blob Storage Power Platform connector.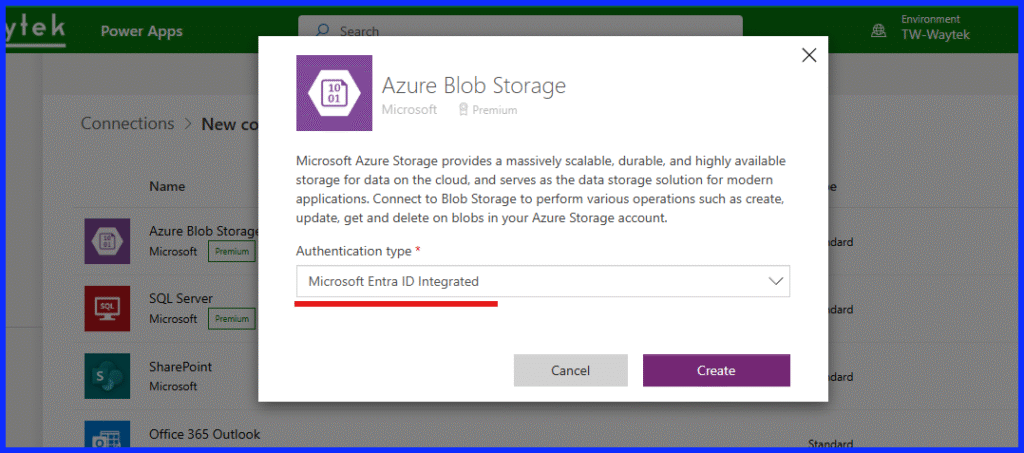
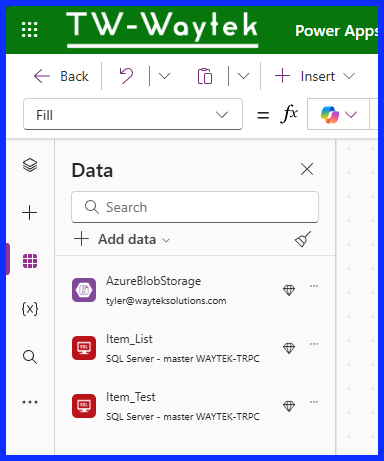
Next you are going to want to connect your data sources to your app if you have not already done so. In my case I added my two SQL tables to the app.
Update the Save Record Button on Online Form Screen
The following Power FX code pertains to the save record button, encompassing three primary functions: updating an existing record, saving a new record, and saving a new image.
Visible Property: Form1.Mode<>FormMode.View
OnSelect Property:
//Online-Edit Non-Image Field Records-SQL
If(
    Form1.Mode = FormMode.Edit,
    Patch(
        Item_Test,
        LookUp(Item_Test, Id = SQLDataGallery1.Selected.Id),
        {
            Item_Number:DataCardValue6.Selected.Item_Number,
            Item_Name:DataCardValue1.Text,
            Product_Test:DataCardValue7.Selected.Value,
            Comments:DataCardValue4.Text
        }
    )
);

//Online-New Non-Image Field Records-SQL, varNewRecord is needed when saving the meta data to SQL Server from the image in Azure Blob.
    If(
        Form1.Mode = FormMode.New,
            Set(
	     varNewRecord,
            Patch(
                Item_Test,
                Defaults(
                    Item_Test),
                        {
                            TimeaDate:DateValue2.SelectedDate + Time(Value(HourValue2.Selected.Value),
                            Value(MinuteValue2.Selected.Value),0),
                            User_Name: DataCardValue8.Text,

                            Item_Number:DataCardValue6.Selected.Item_Number,
                            Item_Name:DataCardValue1.Text,
                            Product_Test:DataCardValue7.Selected.Value,
                            Comments:DataCardValue4.Text
                        }
                )
        )
);
Save a New Image
To save an image to Blob, first create a file name for the image (optional). Then, create the file in Azure Blob. Next, create a collection with three columns for the Blob storage metadata and write the collection to SQL Server. Finally, clear the variables and collection.
//Online-New Image Record-Save Image to Blob and Meta data to SQL Server
        If(
            Form1.Mode=FormMode.New And Not(IsBlank(AddMediaButton1.Media)),
            Set(varImage1FileName, Concatenate("Item_Test", "-", Text(Now(), "yyyymmdd-HHmmss"), "-",
            ddMediaButton1.FileName))
        );

        If(
            Form1.Mode=FormMode.New And Not(IsBlank(AddMediaButton1.Media)),
            Set(varAzureImage1, AzureBlobStorage.CreateFileV2("twwaytek", "blobtest", varImage1FileName,
            AddMediaButton1.Media))
        );

        If(
            Form1.Mode=FormMode.New And Not(IsBlank(AddMediaButton1.Media)),
            Collect(colImages1, {FN1: varImage1FileName, FL1: "https://twwaytek.blob.core.windows.net" &
            varAzureImage1.Path, FID1: varAzureImage1.Id})
            );

        If(
            Form1.Mode=FormMode.New And Not(IsBlank(AddMediaButton1.Media)),
            ForAll(
            colImages1,
            Patch(
                 Item_Test,
                LookUp(Item_Test, Id = varNewRecord.Id),
                    {
                        Image_Name:FN1,
                        Image_Link:FL1,
                        Image_ID:FID1
                    }
                )
            )
        );

    //Reset variables and collections used above
        Set(varNewRecord, Blank());
        Set(varImage1FileName, Blank());
        Set(varAzureImage1, Blank());

        Clear(colImages1);


ResetForm(Form1);
Navigate(OnlineGalScreen);

//If success, notify, if not report the error
If(
    IsEmpty(Errors(Item_Test)),
    Notify("Form Data Submitted Successfully",NotificationType.Success),
    Notify("There was an issue submitting the form data. Please try again.", NotificationType.Error, 5)
);
Image Custom Data Card
The image on an existing record can be edited using the AddMediaWithImage property in the custom data card on the form. When the image is changed on the form, the original image is deleted and replaced in Azure Blob Storage and SQL Server.
UploadedImage1 Image Property:
If(
    Form1.Mode <> FormMode.New And
    IsBlank(AddMediaButton1.Media) And
    Not(IsBlank(ThisItem.Image_ID)),

    AzureBlobStorage.GetFileContentV2("twwaytek", ThisItem.Image_ID),
    AddMediaButton1.Media
)
AddMediaButton1 OnChange Propterty:
//When in Edit Mode, get existing image blob ID stored in SQL Server and save it in varBlobID1
If(
    Form1.Mode=FormMode.Edit,
    Set(varBlobID1, LookUp(Item_Test, Id = SQLDataGallery1.Selected.Id, Image_ID))
);

//When in Edit Mode and a new image was added to AddMediaButton, delete previous image using the Blob storage ID from varBlobID1
If(
    Form1.Mode=FormMode.Edit And Not(IsBlank(AddMediaButton1.Media)),
    AzureBlobStorage.DeleteFileV2("twwaytek", varBlobID1)
);
//When in Edit Mode and a new image was added to AddMediaButton, create a file name and save it in varImage1FileName
If(
    Form1.Mode=FormMode.Edit And Not(IsBlank(AddMediaButton1.Media)),
    Set(varImage1FileName, Concatenate("Item_Test", "-", Text(Now(), "yyyymmdd-HHmmss"), "-", AddMediaButton1.FileName))
);

//When in Edit Mode and a new image was added to AddMediaButton, save file to blob storage using varImageFileName and file properties in AddMediaButton, then save blob storage file meta data to varAzureImage1
If(
    Form1.Mode=FormMode.Edit And Not(IsBlank(AddMediaButton1.Media)),
    Set(varAzureImage1, AzureBlobStorage.CreateFileV2("twwaytek", "blobtest", varImage1FileName, AddMediaButton1.Media))
);

//When in Edit Mode and a new image was added to AddMediaButton, create a collection called colImages1 that contains the blob storage image Name, URL and ID
If(
 Form1.Mode=FormMode.Edit And Not(IsBlank(AddMediaButton1.Media)),
    Collect(colImages1, {FN1: varImage1FileName, FL1: "https://twwaytek.blob.core.windows.net" & varAzureImage1.Path, FID1: varAzureImage1.Id})
    );

//When in Edit Mode and a new image was added to AddMediaButton, Patch the collection colImages1 columns File Name, URL and ID to the edited record in SQL Server
If(
    Form1.Mode=FormMode.Edit And Not(IsBlank(AddMediaButton1.Media)),
    ForAll(
    colImages1,
    Patch(
        Item_Test,
        LookUp(Item_Test, Id = SQLDataGallery1.Selected.Id),
            {
                Image_Name:FN1,
                Image_Link:FL1,
                Image_ID:FID1
            }
        )
    )
);

//Reset the variables and collection below:
Set(varBlobID1, Blank());
Set(varImage1FileName, Blank());
Set(varAzureImage1, Blank());

Clear(colImages1);
SQL Results
Below is an example of a new record in SQL Server with the image name, link, and ID.

Image Name: Item_Test-20250514-080921-20180902_153809632_iOS.jpg
Image Link: https://twwaytek.blob.core.windows.net/blobtest/Item_Test-20250514-080921-20180902_153809632_iOS.jpg
Image ID: JTJmYmxvYnRlc3QlMmZJdGVtX1Rlc3QtMjAyNTA1MTQtMDgwOTIxLTIwMTgwOTAyXzE1MzgwOTYzMl9pT1MuanBn
Closing
Saving images to Azure Blob Storage is much cheaper and more efficient than saving images directly into the SQL Server database. The storage options in Blob storage are plentiful and robust. The only limit on the number of images that can be stored is budgetary.