Power Automate can help with moving email attachments from an email account to SharePoint. In Part 1 of this 4 part series, we are going to walk through the steps on how to setup a Microsoft Outlook rule to move an email with an attachment to a specific folder in Outlook, copy its contents to a new Excel file in SharePoint, and add the date and time to the name of the file.
For the video of this post, click the link below:
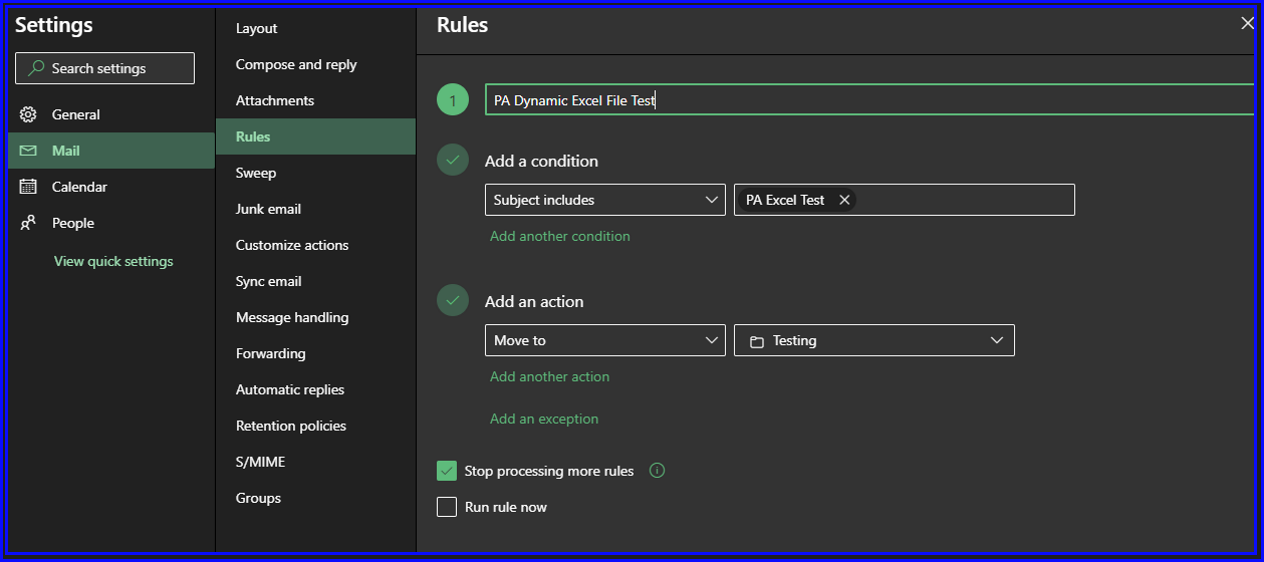
Step 1: Setup and test email rule:
Step 1a: Create a folder in Outlook to save email messages to. Setup an email rule in M365 to move email with an Excel file to that specific folder. In this example, “Testing” is the name of the email folder.
This rule will be the trigger for the flow.
Step 1b: Send a test email and confirm it’s receipt in the new folder.

Step 2: Setup Power Automate Flow to add Excel file to a SharePoint Folder
Create a new Automated Cloud Flow:
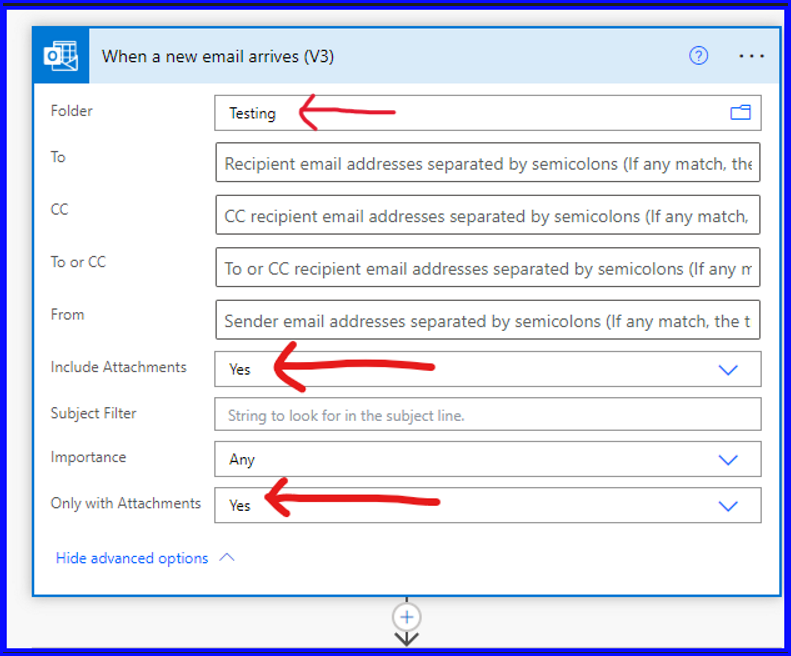
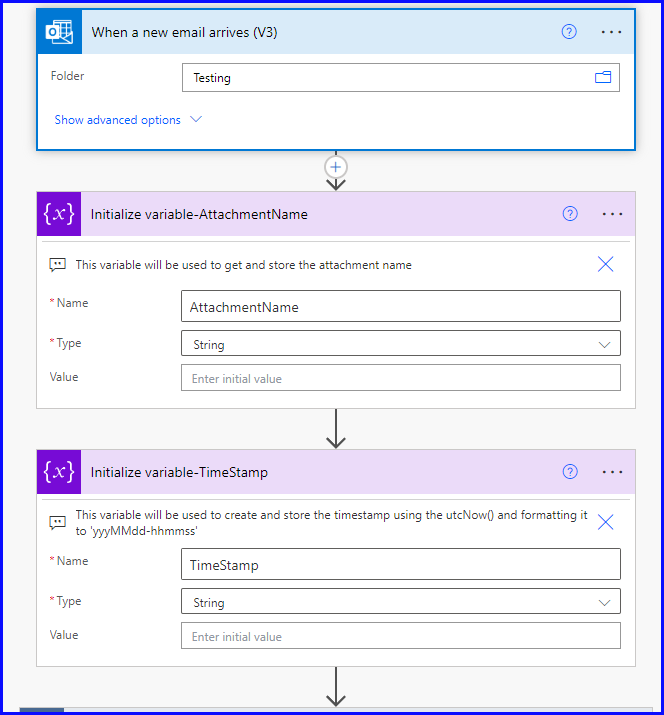
Select “When a new email arrives (latest version) and enter the values for the fields below:
- Folder: Select the folder you created in Step 1a.
- Include Attachments: Yes
- Only with Attachments: Yes
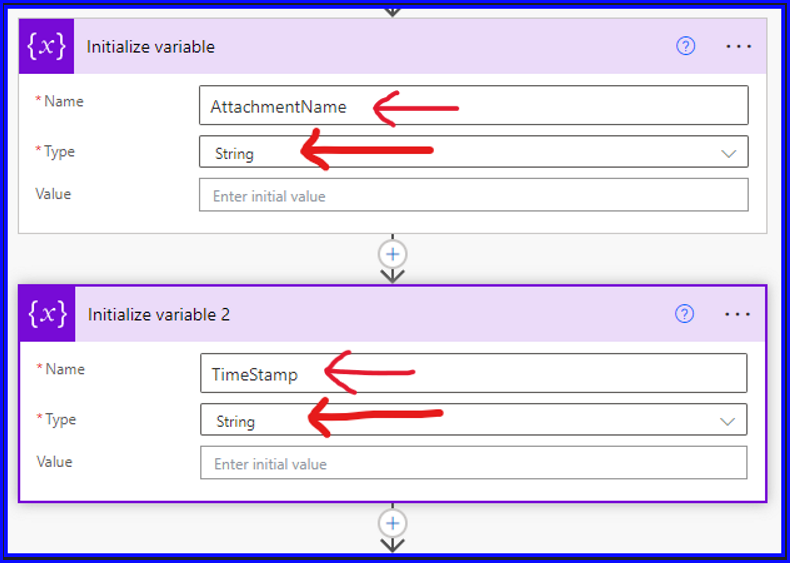
Step 3: Add two variables, one to store the attachment name and the other to store the timestamp.
- Name: Choose a relatable name for the variable
- Type: String
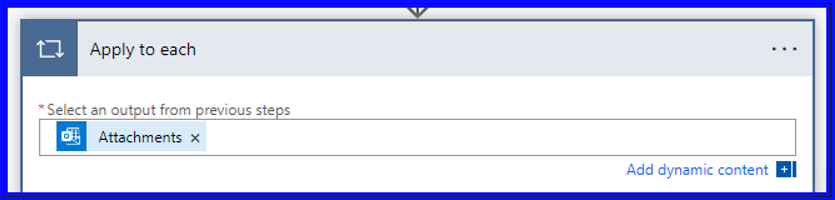
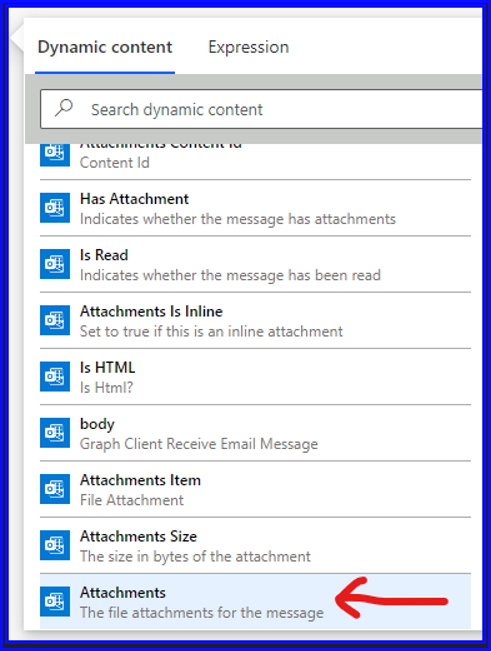
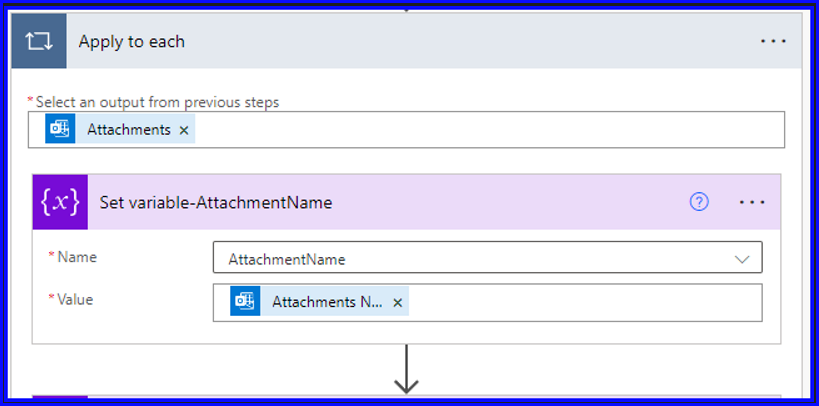
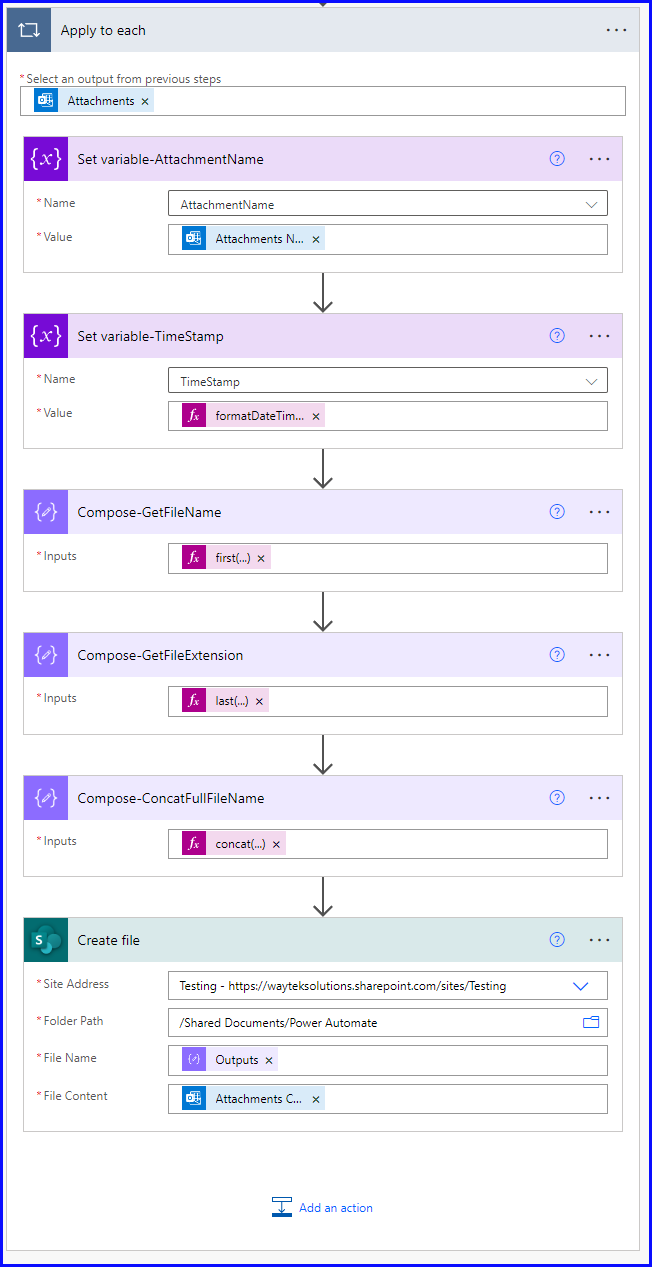
Step 4: Is to add the step “Apply to Each” and select the dynamic content “Attachments”
Step 5: Add variable content to the variable:
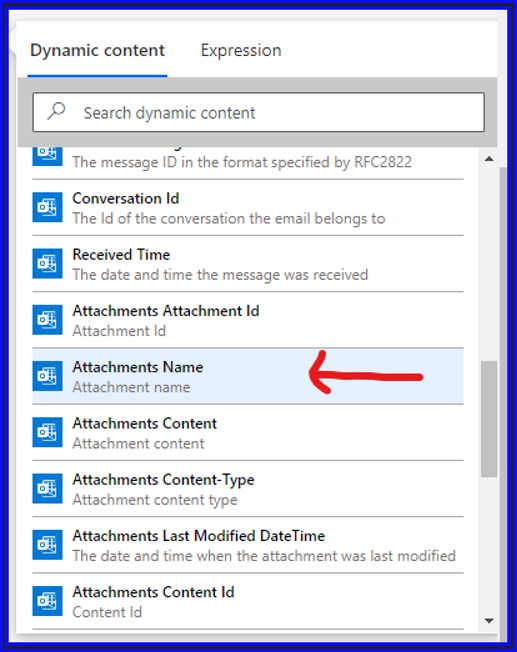
5a: First is the Attachment Name. Select Set Variable, name it AttachmentName and select the value as “Attachment Name”
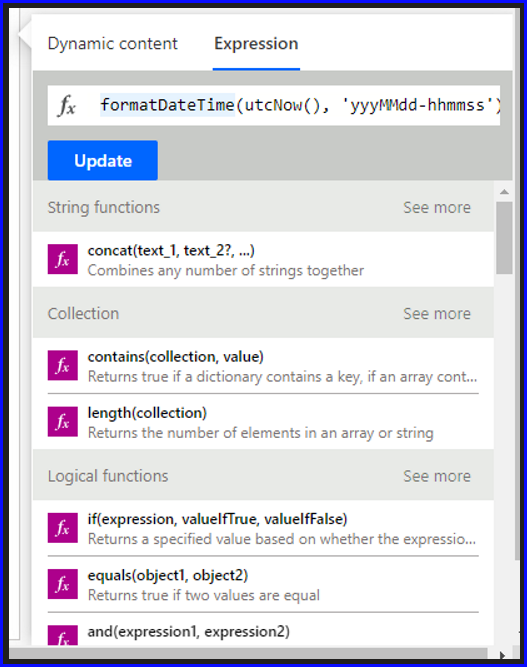
5b: Second is the TimeStamp. Select Set Variable, name it TimeStamp and select the value an Expression:
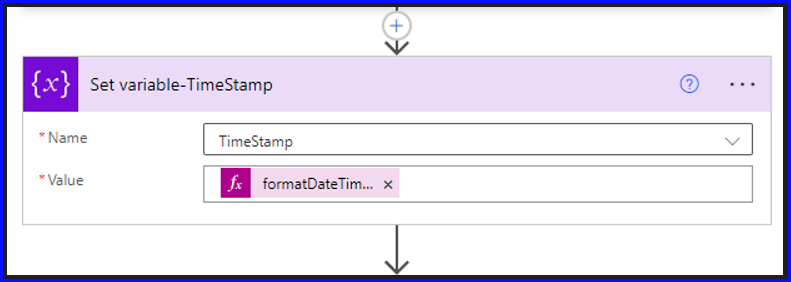
Use this formula: formatDateTime(utcNow(), ‘yyyMMdd-hhmmss’)
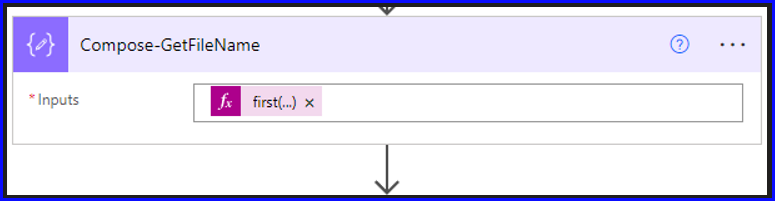
Step 6: Create three compose actions:
6a: First compose action is to get the file name using the expression below:
first(split(variables(‘AttachmentName’),’.’))
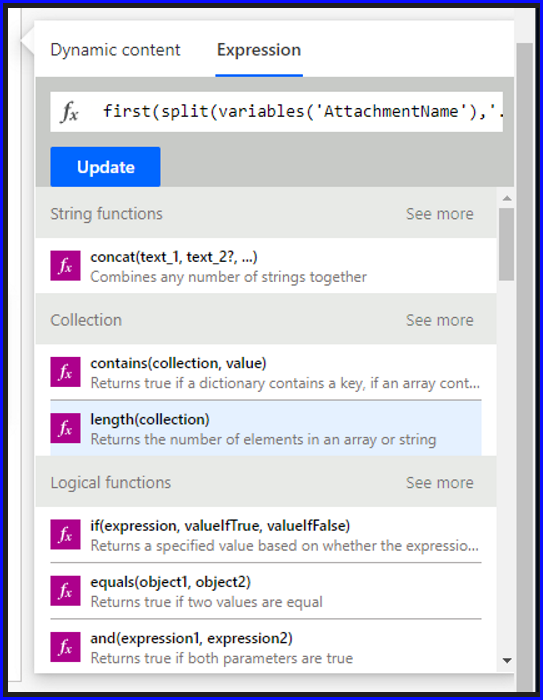
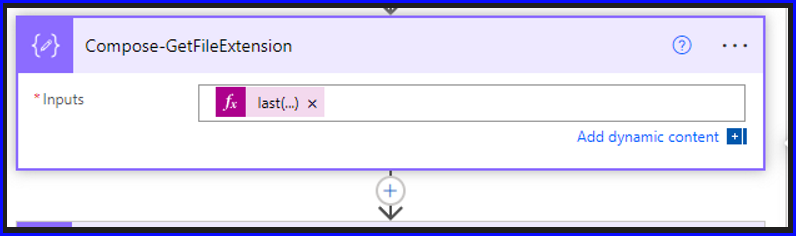
6b: Second compose action is to get the file extension using the expression below:
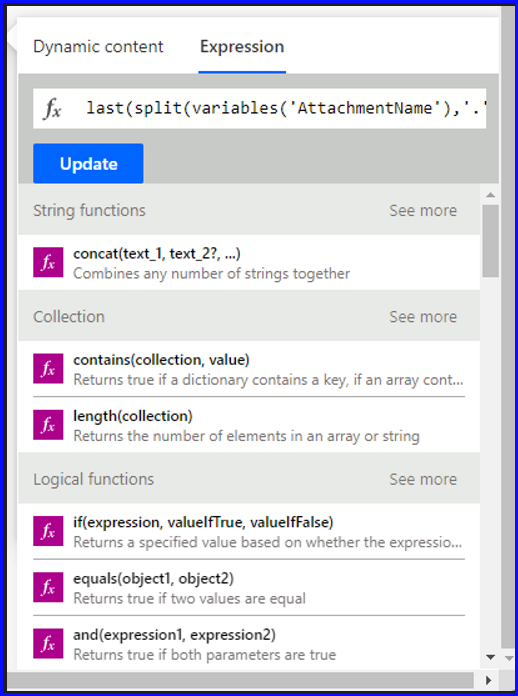
last(split(variables(‘AttachmentName’),’.’))
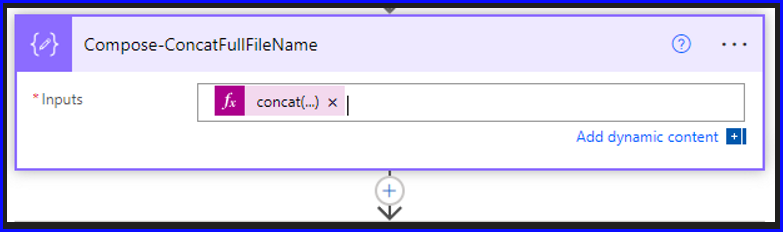
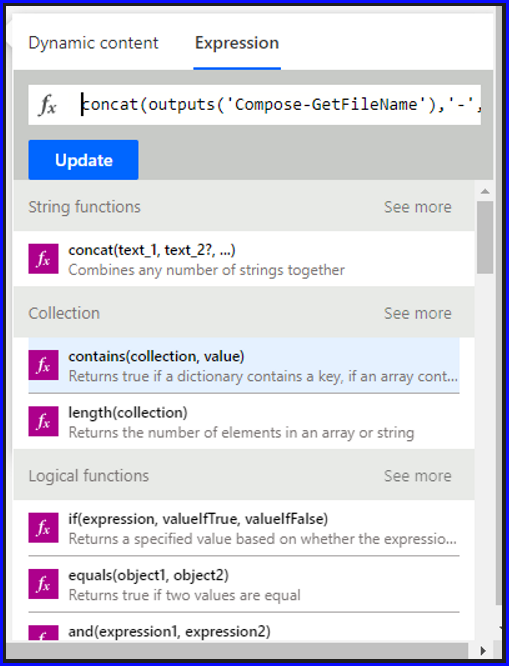
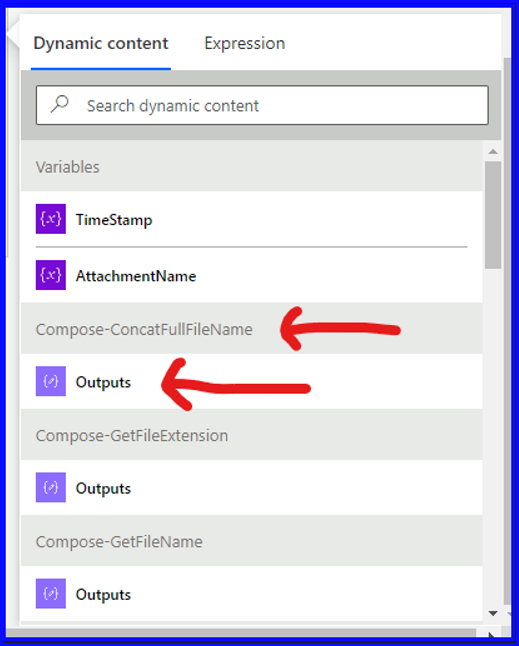
6c: Third compose action is to build the full file name using the expression below:
concat(outputs(‘Compose-GetFileName’),’-‘,variables(‘Timestamp’),’.’,outputs(‘Compose-GetFileExtension’))
Step 7: The last step is create to the file in the SharePoint site:
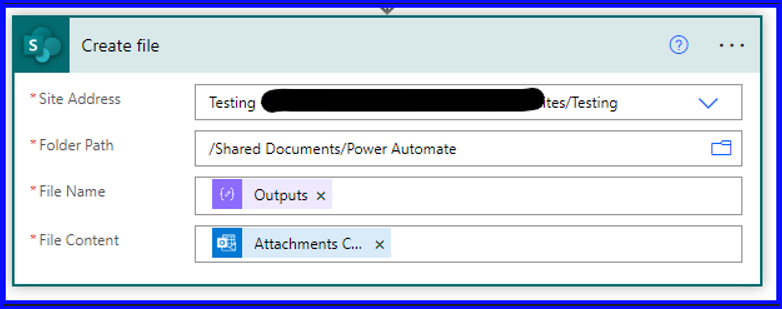
7a: Select the SharePoint site where the file should go
7b: Select the folder path in the SharePoint site to save the file
7c: Select dynamic content Output for the File Name and choose the output from under Compose-ConcatFullFileName
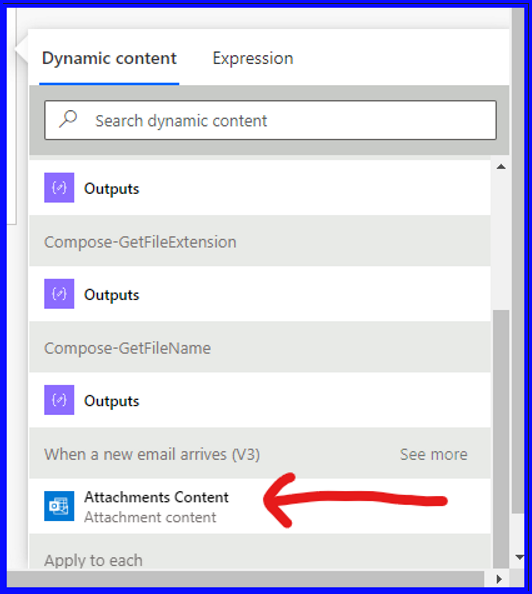
7d: Lastly, for the File Content select dynamic content “Attachments Content” under When a new email arrives (latest version).
The whole flow should like this:
Click on the links below to go to each blog post in the series:
Series Summary: Using Power Automate to Move, Rename, and Copy Excel Content to Another Excel File-Click Here!
Series 2 of 4: Copy Excel Content (Dynamic) from Excel file to Another-Click Here!
Series 3 of 4: Connect Power BI to Excel-Click Here!
Series 4 of 4: Manage Power BI Data Refresh-Click Here!