Moving content from one Excel file to another is a common task that Power Automate can do rather effectively. In Part 2 of this 4-part series, we are going to go through the steps on how to copy the contents from one Excel file to another when a file is created in SharePoint. This other Excel file is the master data file. When the file is created the flow will add the data to a table and append the contents of the table to the master data file’s table.
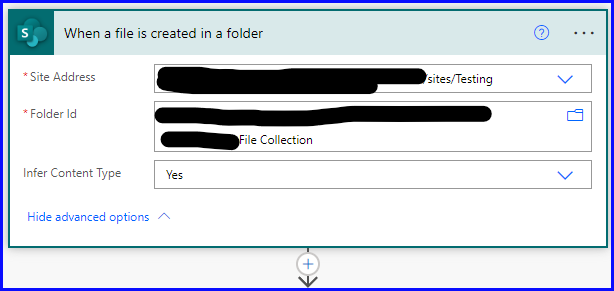
Step 1: Create a new Automated Cloud Flow. The trigger is started when a new Excel file is created in a specific SharePoint folder. Start with “When a file is created in a folder (in SharePoint):
- Select the SharePoint site address, if you’re not sure how to find it, open up the SharePoint site in your browser and copy the link to the site.
- Select the folder in the site where the file from Part 1 was being added.
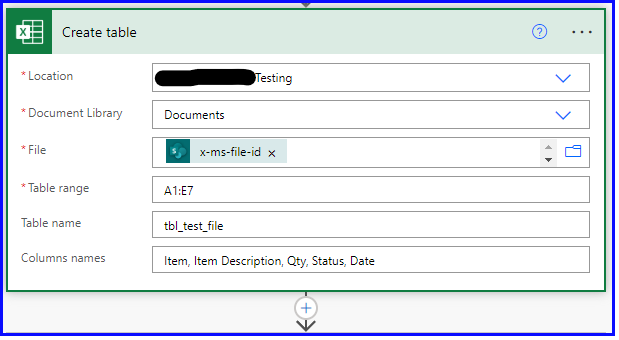
Step 2: Select Create table (Excel for Business)
- Location: Select the location of Excel file.
- For File select X-ms-file-id (SharePoint) in Dynamic Content under “When a File is Created in a Folder”.
- For the Table Range use a range that is always more than the expect number of rows in the file. If you’re not sure add a 50% buffer or more rows to the range. It’s important to note that the difference will be added as blank rows in the master data file, a filter will be used to remove the blank rows in Step 4.
- Use any table name.
- Use the same column names that are in the master data file.
- In this case I added the Date column which is a new column not in the file and will be needed later in the post.
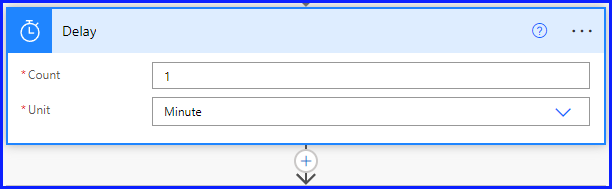
Step 3: Add a Delay in your flow (If needed).
- Adding this step will give the flow time to create all the rows in the table before it tries to list all the rows in the table to be copied to the master data file. Adjust the time of the delay based on the number of rows in the table. For this example, a one-minute delay was chosen.
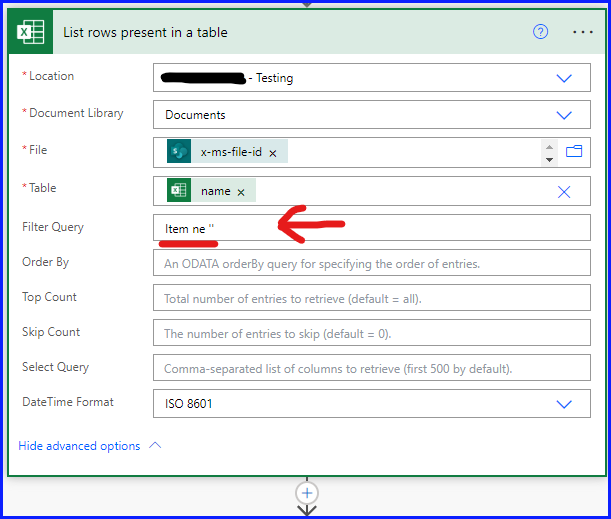
Step 4: List rows present in a table (Excel for Business)
- For Location select the SharePoint site from the drop down, use the same site as in Step 1.
- Select Documents for the Document Library.
- For File select X-ms-file-id (SharePoint) in Dynamic Content under “When a File is Created in a Folder”.
- For Table select Table Name (Under Create Table) in Dynamic Content.
- Select Advance Options, and add a filter query to remove blank rows using an OData filter.
- Select a column that should have data in it like a primary key or row counter, enter its name exactly how it’s spelled including case sensitivity, then ne for not equals to, then either the word Null or two single quotes. Both should work but this query doesn’t always play nicely with Power Automate.
Step 5a: Apply to Each
- Under “List Rows Present in a Table” under Dynamic Content select List of Items-Value.
Step 5b: Add a Row into a Table (Excel for Business)
- For Location select the SharePoint from the drop down, use the same site as in Step 1.
- Select Documents for the Document Library.
- Select the path to the file in the Document Library.
- The table name of that was created in Step 2 should be in the drop-down list when selecting the table.
- Scroll down to see how to do the next steps.
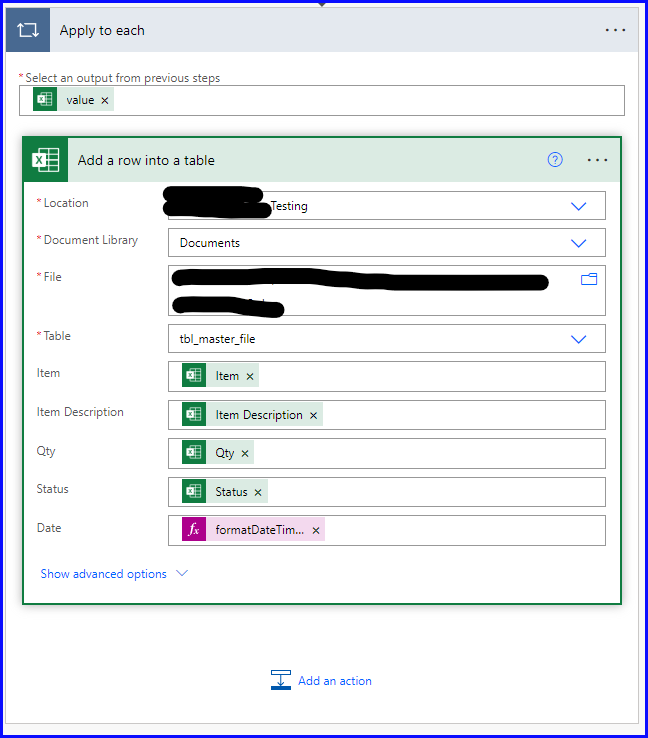
Step 5b in more detail for the table columns:
- For each column of the table, it looks like they were selected within Dynamic Content but actually they are expressions.
- The expression format for each is items(‘Apply_to_each’)?[‘Column Name’] except the date column.
- The date column uses the expression for inputting today’s date.
Each Expression:
- items(‘Apply_to_each’)?[‘Item’]
- items(‘Apply_to_each’)?[‘Item Description’]
- items(‘Apply_to_each’)?[‘Qty’]
- items(‘Apply_to_each’)?[‘Status’]
- items(‘Apply_to_each’)?[‘Date’]
- formatDateTime(utcNow(),’yyyy/MM/dd’)
Click on the links below to go to each blog post in the series:
Series Summary: Using Power Automate to Move, Rename, and Copy Excel Content to Another Excel File-Click Here!
Series 1 of 4: Copy Email Attachment to SharePoint and Rename-Click Here!
Series 3 of 4: Connect Power BI to Excel-Click Here!
Series 4 of 4: Manage Power BI Data Refresh-Click Here!