Intro
In this post, I discuss how to use Microsoft (SharePoint) Lists to track projects. Although Microsoft Planner is a great tool and Microsoft Project is fantastic as well, sometimes you need more customization that is not readily available in those two applications. With Microsoft Lists, you start with a blank slate, it is completely customizable, and easy to setup and maintain.
I may interchange Microsoft Lists with SharePoint List and vice versa, to clarify Microsoft Lists is SharePoint Lists that is packaged as separate application. If you create a Microsoft List, it will be created in SharePoint as a SharePoint List. For more information on Lists you can click here.
Creating the List
I’m creating a List based on one I created while developing Microsoft Power Apps at Cuisine Solutions. We were converting over 200 Quality Assurance paper forms into Power Apps and needed a way to track our progress both internally for the IT team, for the plant QA project managers, and for leadership of both teams. This will be a very simplified version of the List but can serve as a blueprint for you and your team to get started.
All Items View
All of the records in Microsoft Lists are organized into Views and the default View is “All Items”. The default and only column is “Title”, and the first step is to rename the Title column to “Item Name”.
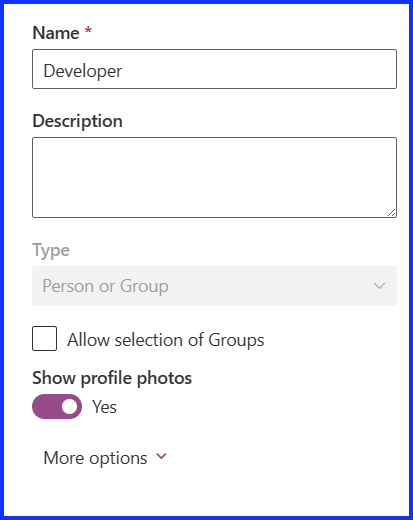
Next create a Person column called “Developer”, select “Show Profile Photos” and under more options select “Allow Multiple Selections”. Click on the image below to expand it.
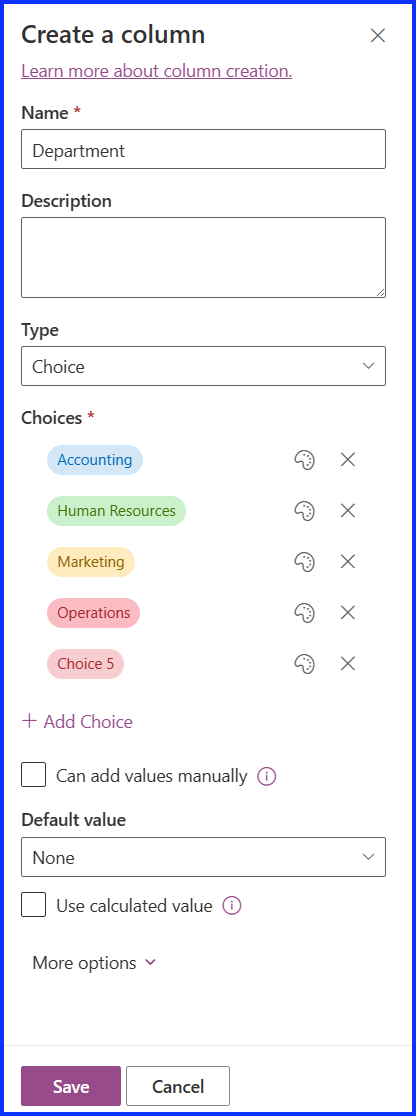
Next create another Person column same as above and name it “End User”. Then create a choice column called “Department” with the choices: Accounting, Human Resources, and Marketing. Remember to remove the last choice. This column has no default value. Click on the image below to expand it.
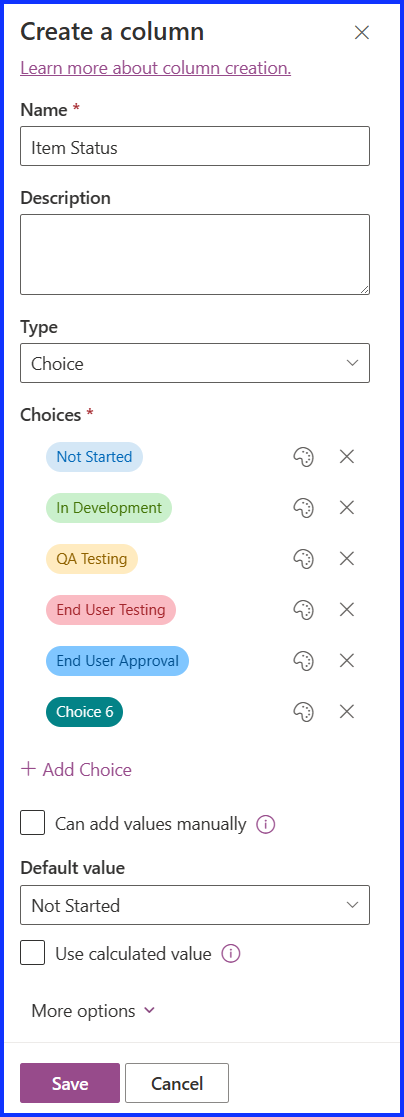
Then create another Choice column called “Item Status” and with the choices: Not Started, In Development, QA Testing, End User Testing, End User Approval. The default value for this column is “Not Started”. Remember to remove the last choice. Click on the image below to expand it.
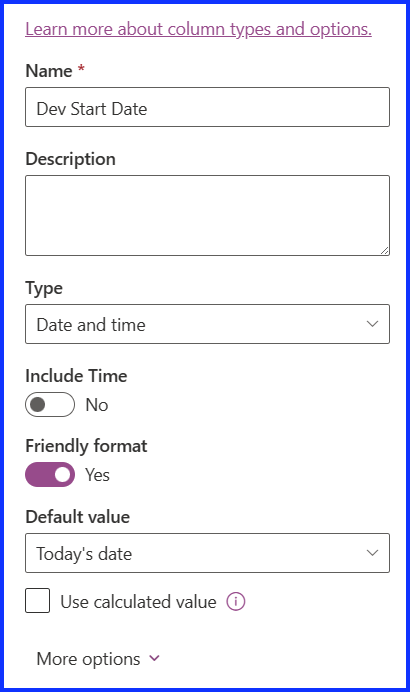
Next, add a new Date/Time column called “Dev Start Date” with Friendly Format and that defaults to Today’s Date. Click on the image below to expand it.
Then create two more date/time columns the same as above, one called “Dev End Date” but with no default value and the other called “End User Approval Date” but with no default value.
Project Status Board View
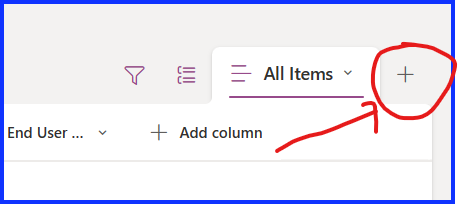
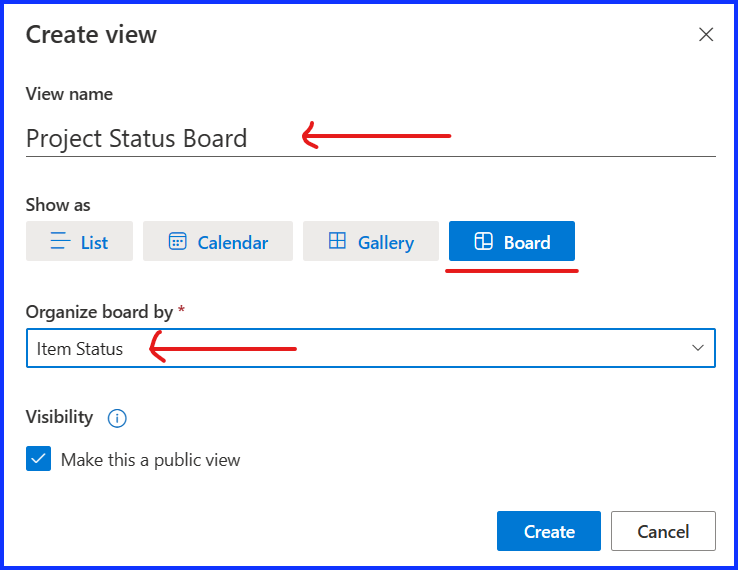
The next View to create is called “Project Status Board View”, to create a new View click the “+” button in the upper left of the screen and enter its name. Select show as “Board” and organize by “Team Member”. Make it visible to the public and the click “Create”. Click on the images below to expand them.
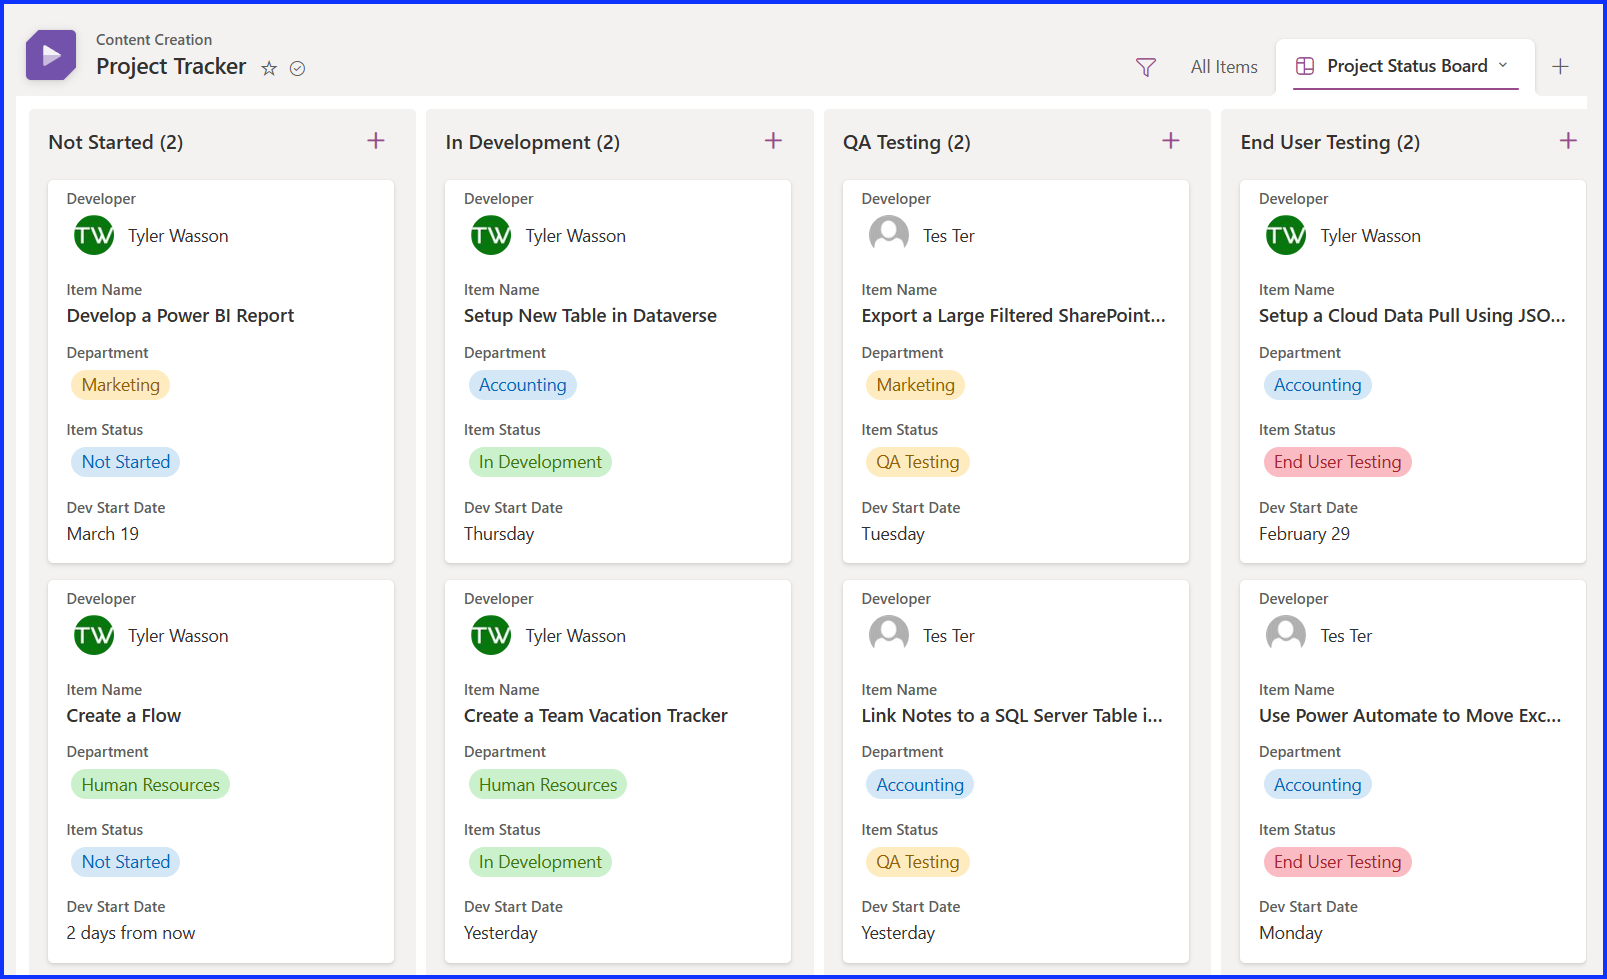
From within the View, hide the “Unassigned Items” status. You can drag items across “Item Status”, and it will update the status of that item to the status you drop it in. Click on the image below to expand it.
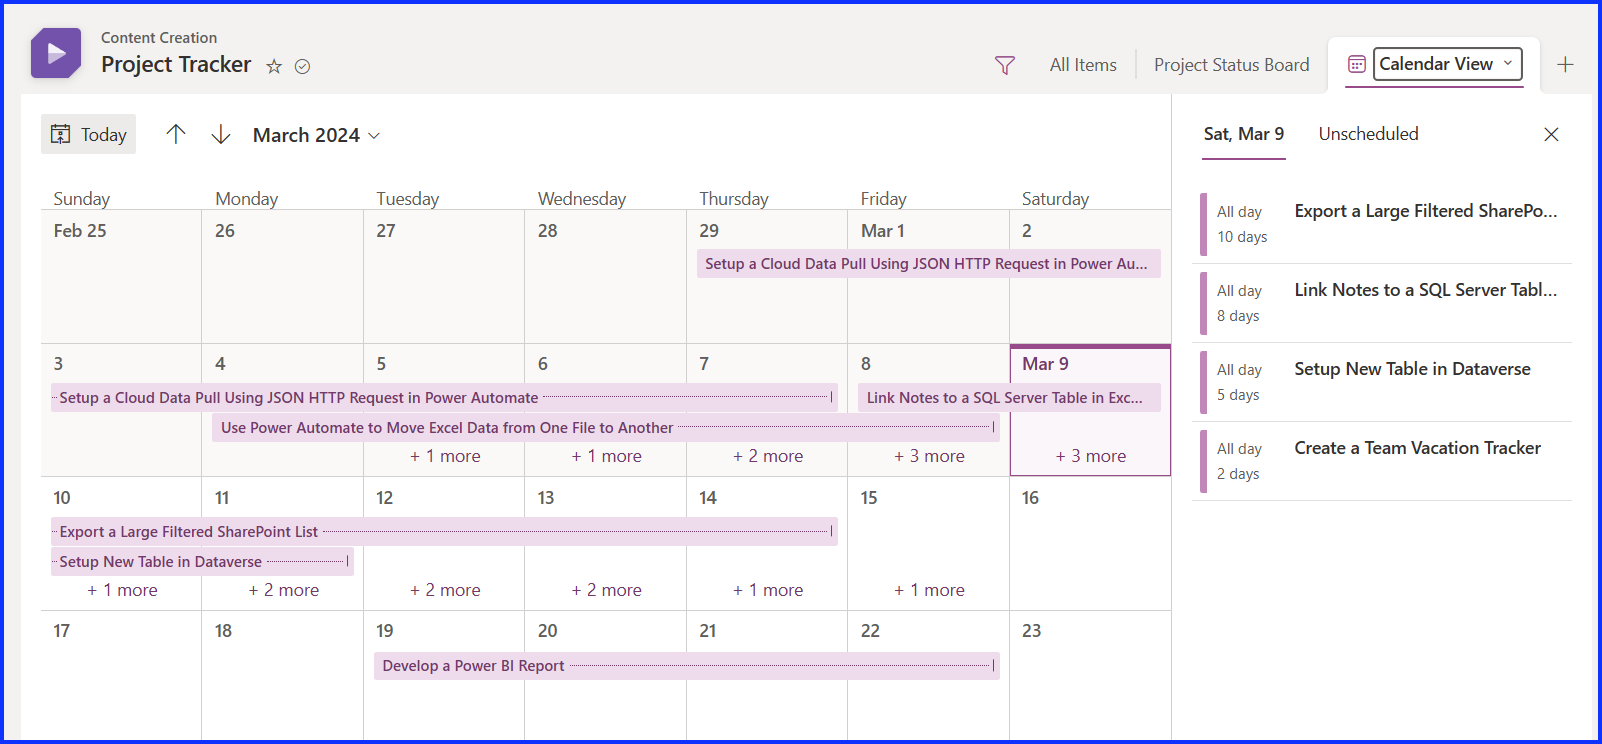
Calendar View
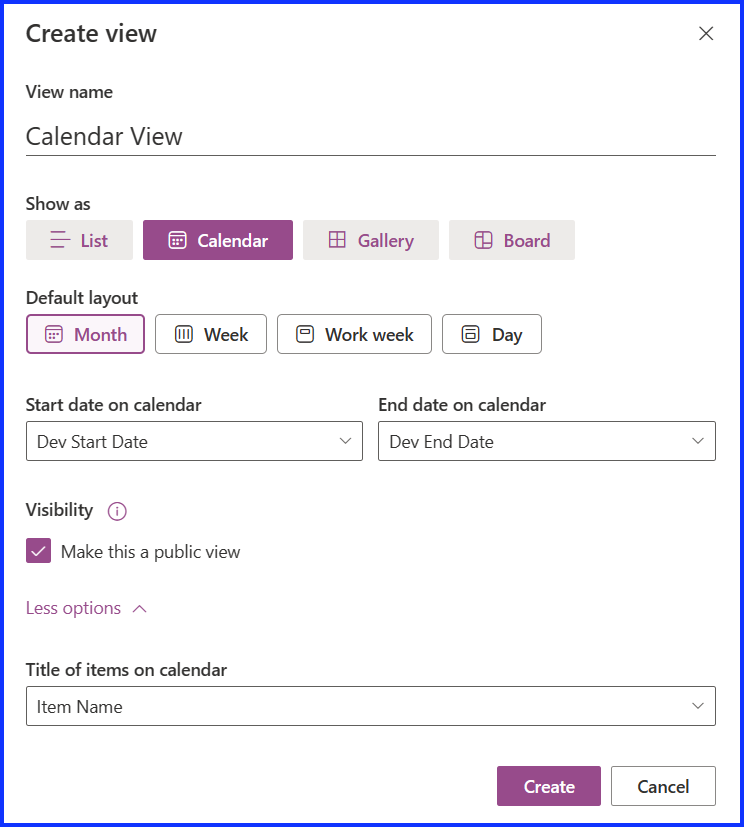
To create the Calendar View, click on the add new view button (+), then add its name, select show as “Calendar View”, and Default Layout is by “Month”. The Start Date is “Dev Start Date”, and the End Date is “Dev End Date”. Make it visible to the public. Select Title as “Item Name” and then click “Create”. Click on the images below to expand the images.
Open Items by Developer
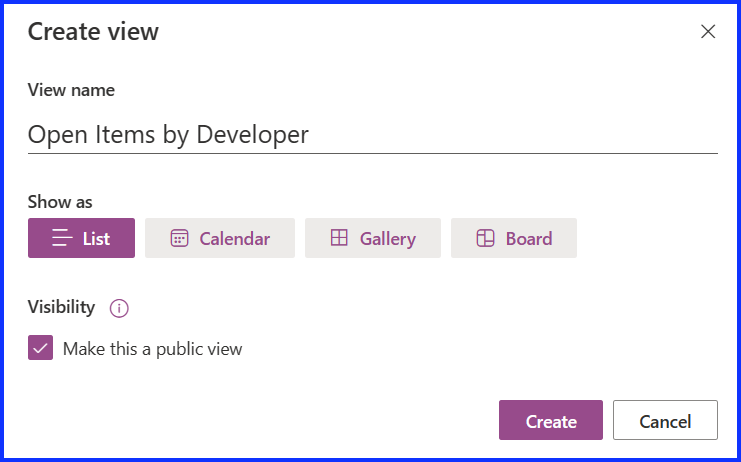
To create the Open Items by Developer view, click on the “Add New” button, then provide the name for the view, select show as a “List”, make it visible to the public and then click create. Click on the image below to expand it.
Select the “Group By” button (shown below) and then select the “Developer” column. You must keep Developer as a column in the view in order to group them. Click on the image below to expand it.

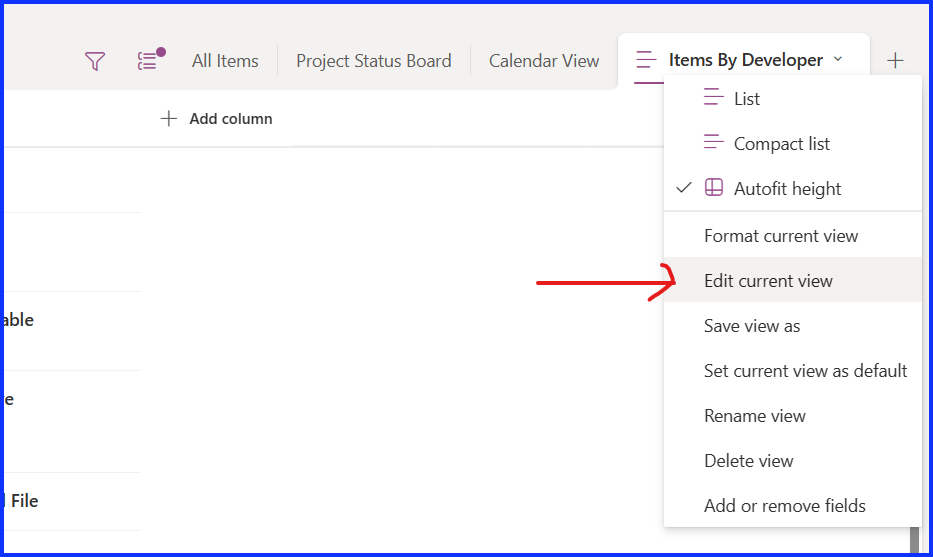
Go to the View, select the drop-down menu and select “Edit Current View”. This takes you to the SharePoint List view editor. Click on the image below to expand it.
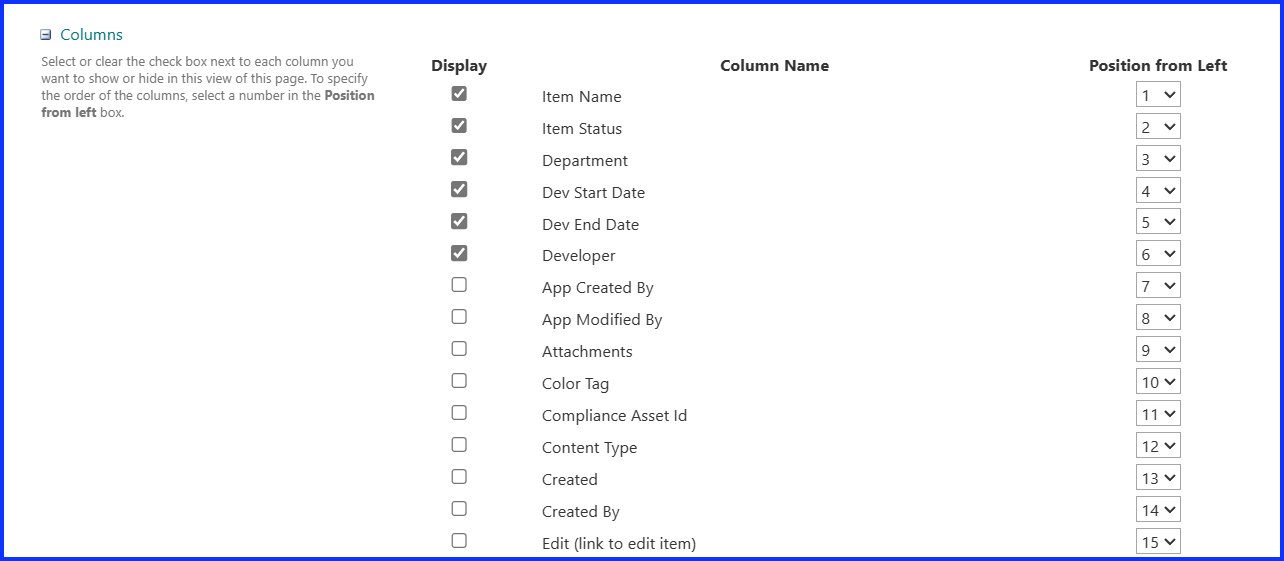
Select the columns you want and the order they need to be in. Click on the image below to expand it.
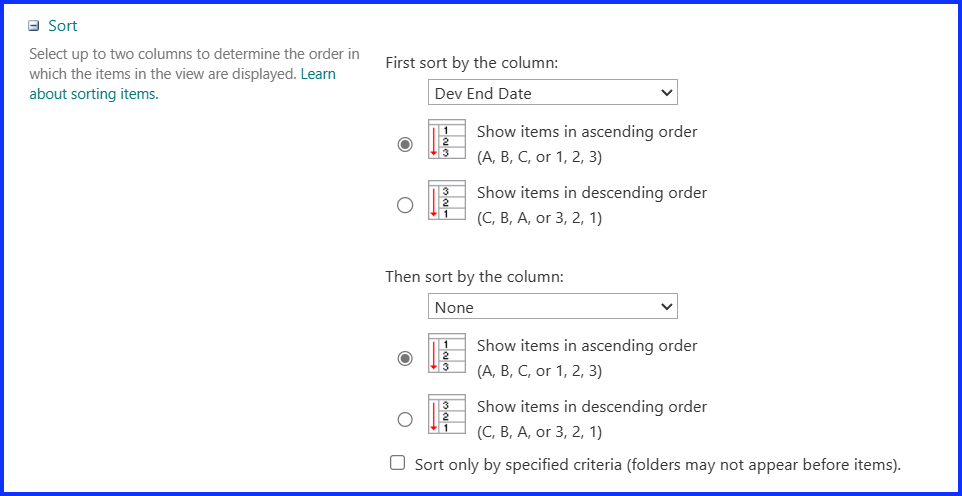
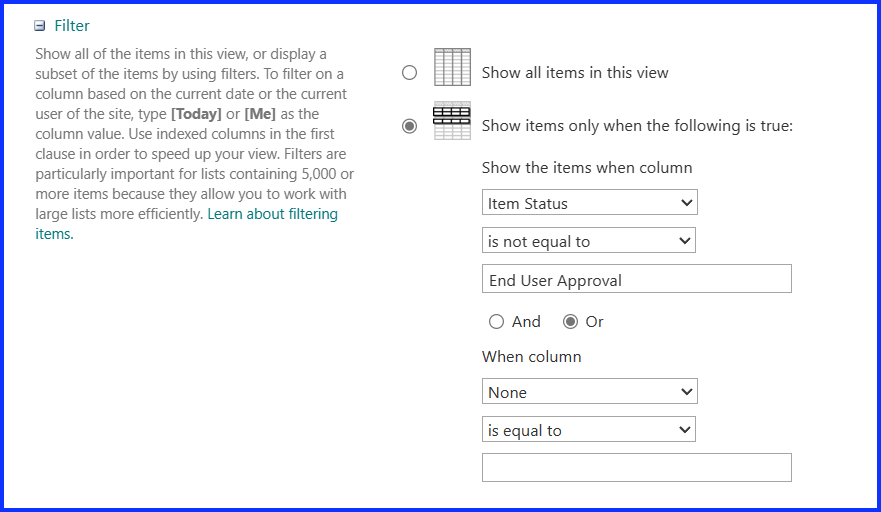
Then select the sort and filter options, I’m sorting by “Dev End Date” and filtering by “Item Status” that includes only items that are not completed by selecting the setting “Is not equal to” and “End User Approval” (show below) and then click “Ok”. Make sure to save the current view. Click on the images below to expand them.
Sorting, Filtering, and Grouping the List
One of the benefits of Microsoft Lists is its ability to organize and filter information. This is very helpful when managing a lot of information and are frequently referencing bits and pieces of the data. Microsoft Lists provide many ways to easily slice and dice the data.
Sort, Filter by, and Group
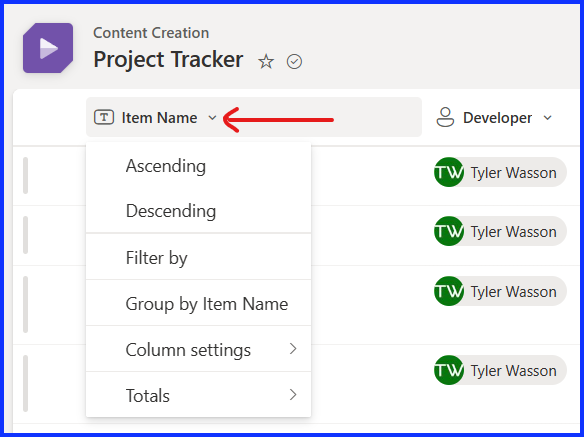
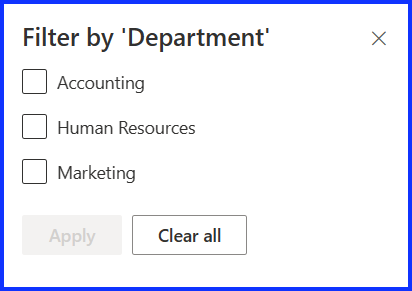
Each column allows for sorting and filtering. To sort or filter a column select the drop-down icon under any of the columns, a drop-down menu will appear. Here you find the option to sort the column by either Ascending or Descending order, and/or filter by this column. When selecting the option to filter, it takes you to a side bar where you can select the items to filter by (shown below). On this menu is also the option to group by this column, doing so will categorize all the records under each column value in this List, like was demonstrated in the “Open Items by Developer” view. Click on the images to expand them.
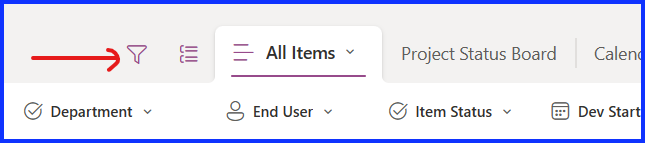
Filter Button
There is also the filter button which opens up a sidebar that has many of the columns in the list to filter by and you can add or remove columns on this quick filter pane. It is kind of a quick reference filter pane (shown below). Click on the images to expand them.

Conclusion
This was a simple example of how to use SharePoint Lists to manage your projects, with a focus on Dev Ops. Think of this example as building blocks that can be adapted to your own project. Once finished you can share the list with your various stakeholders. Let me know in the comments below any feedback you have, if this post was helpful or if you have any recommendations for future posts.