In the previous post I imported 100,000 rows of data from Excel into a SharePoint List using Power Automate. In this post, I will export a large amount of filtered data out of the same SharePoint List and into a CSV file using Power Automate.
Within Power Automate, I’m just using a manual trigger and the first action is “Get Items (SharePoint)”. For this action, add your site address and then the name of the List.
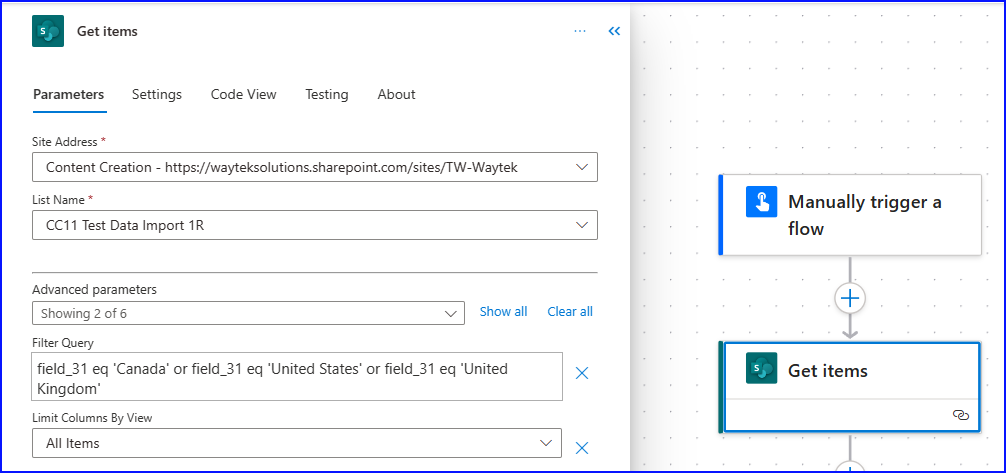
Next are the advanced parameters needed to filter the data, it took me a while to figure this section out as I struggled with getting the proper query in order to successfully extract only the data I needed. The issue was, I was using the name I gave to the List column but apparently SharePoint assigns its own name, and they are not the same.
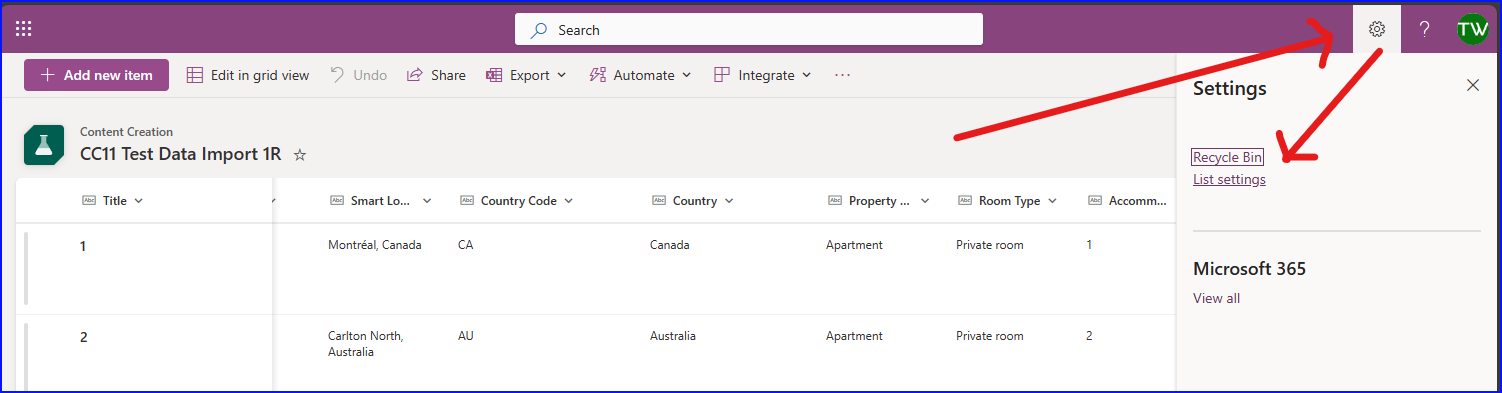
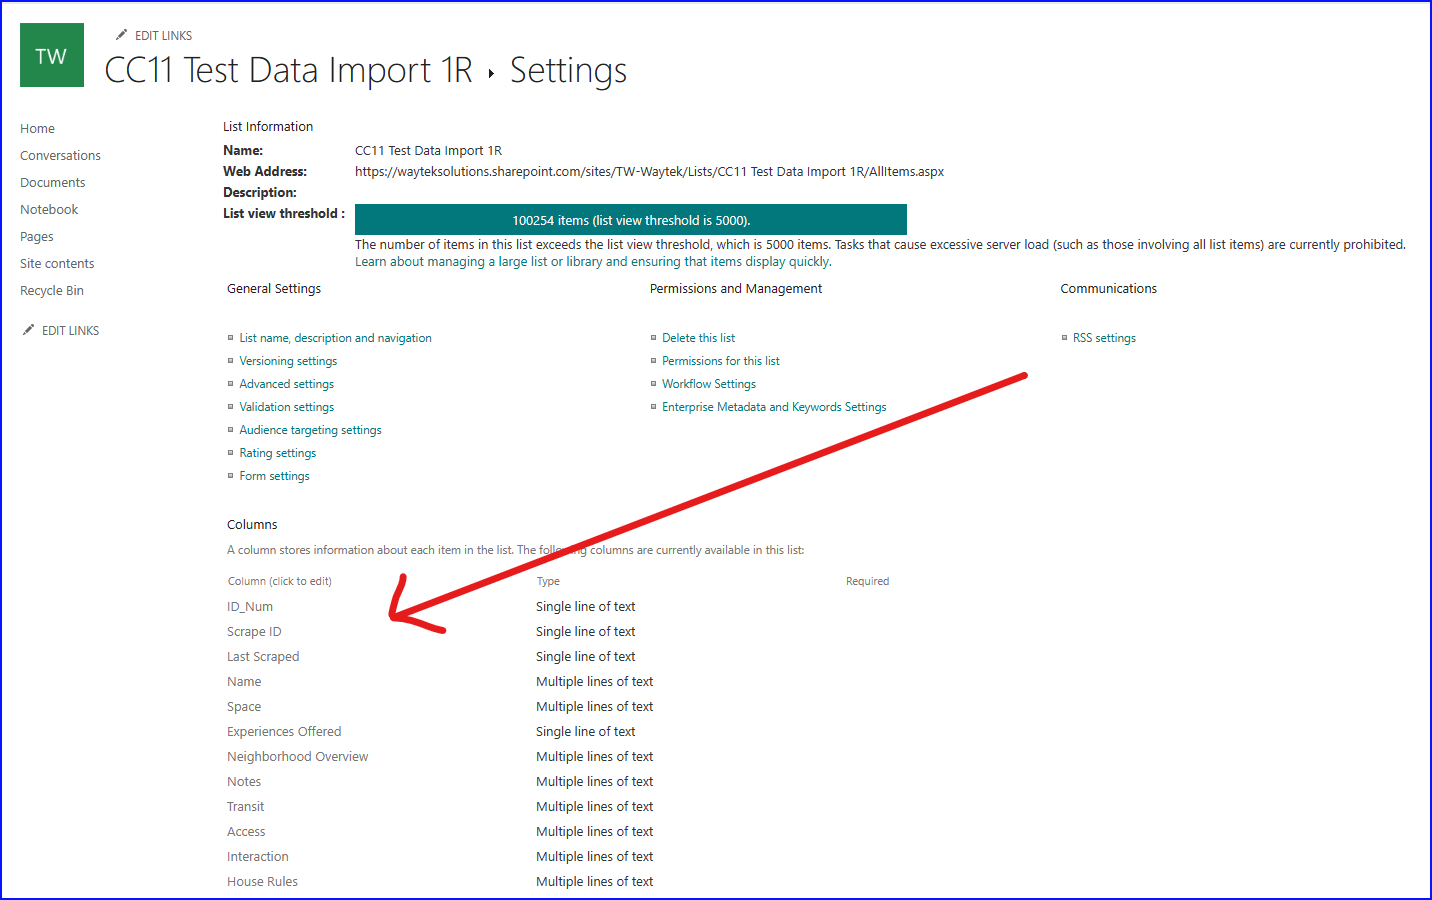
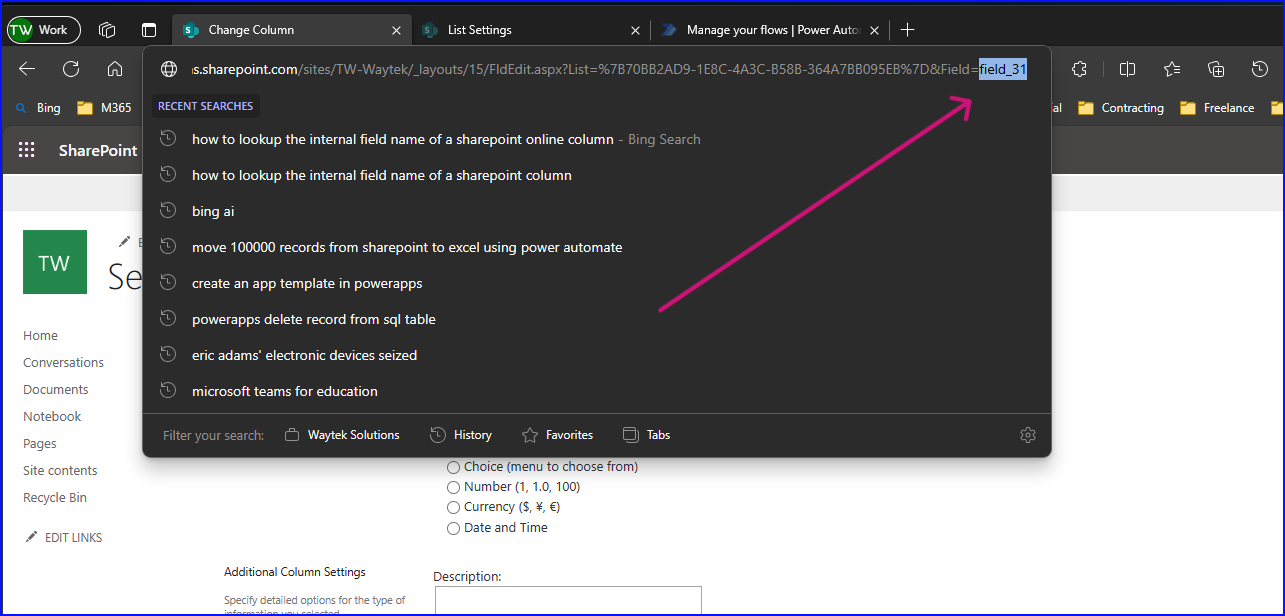
To verify the column name, got to your SharePoint/Microsoft List then go to List Settings (shown in first image below), then from List Settings and under Columns click on the column name you want to confirm (shown in second image below), then go to the address bar in your browser and move your cursor to the very end of the bar, there you should see the column name as “Field_Number” (shown in third image below).
I was looking for rows with the Country Name as Canada, United Stands and United Kingdom. The Country column’s SharePoint name was field 31. My OData query was as follows:
field_31 eq ‘Canada’ or field_31 eq ‘United States’ or field_31 eq ‘United Kingdom’
For the last parameter for this action, I selected the “All Items” column view for the columns I wanted in the export. You can select any SharePoint List view you have available.
Large Dataset Limitations:
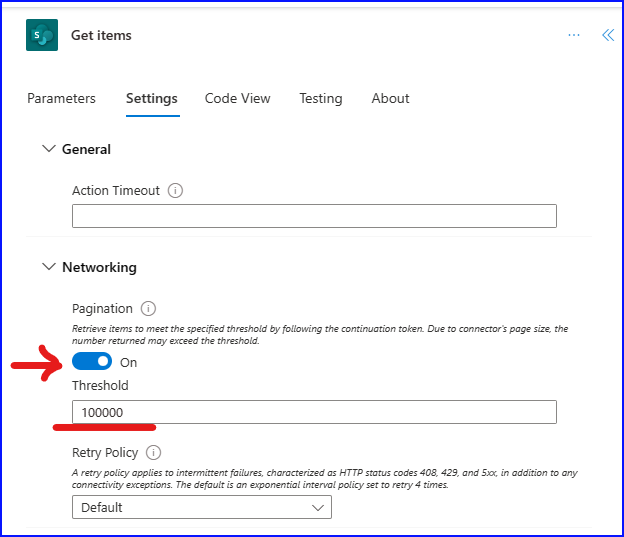
There are a couple of limitations to overcome with this export. The default maximum number of records to retrieve is 100. Fortunately, the maximum number of records available to retrieve is 100,000. While in “Get Items” click on settings, turn Pagination on and enter the maximum number of records to retrieve up to 100,000 as shown in the image below.
The other obstacle is the data retrieval results size, it cannot be over 209 megabytes. I have over 5.6 million datapoints and if I were to pull the full 100,000 records I would put my export file size over the size limit. By using the OData filter I was able to reduce the data results size and allowed the flow to work.
Remember the file size is based on the number of rows and columns as well as the amount of content in each record. Some of my cell values have long multi-line text fields which was driving the high file size. After the OData filter, the end result was almost 2.4 million datapoints but still below the 209 mb results size limit.
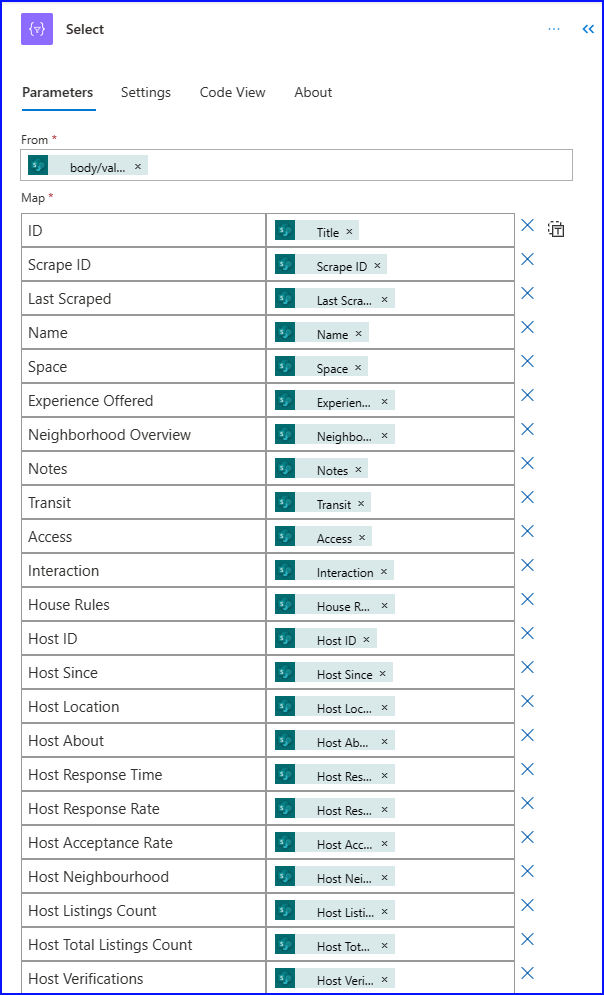
The next action is “Select” and it’s a Data Operation. Under the “From” parameter select dynamic content and choose the SharePoint List Body/Value from the Get Items action. The “Map” parameter will expand with all the columns in the SharePoint List and here you will select the dynamic content option and under “Get Items” match the corresponding column value as shown below.
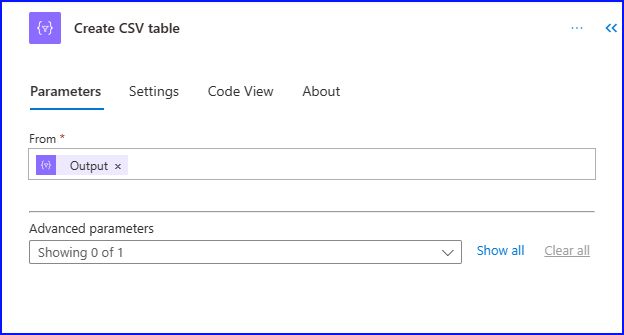
The next action is the “Create CSV Table”, in the From field select the dynamic content “Output” from the Select action.
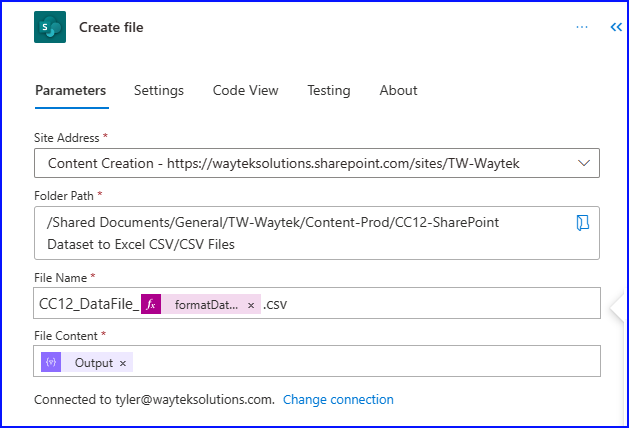
Last action is the “SharePoint Create File” action. Here you are going to want to provide the SharePoint site address, folder path, File Name, and File Content. To avoid having to overwrite the file I added a dynamic date string in the file name that includes the date and time.
formatDateTime(utcNow(), ‘yyyMMdd-hhmmss’)
Make sure to include the .csv at the end of your file name. For the File Content select dynamic content and choose Output from the Create CSV Table action.
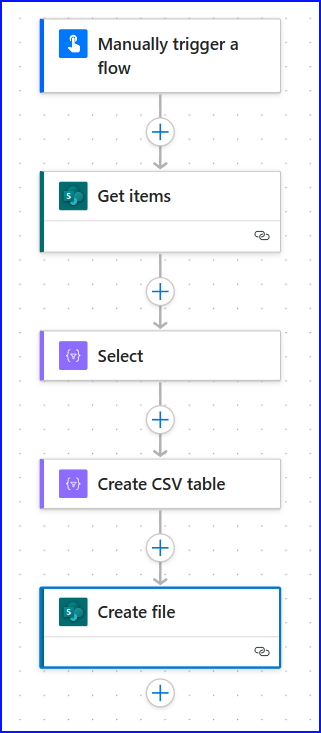
Here is what your flow should look like: