In this blog post, you’ll learn how to setup a data gateway in Power Automate using a premium power automate subscription.
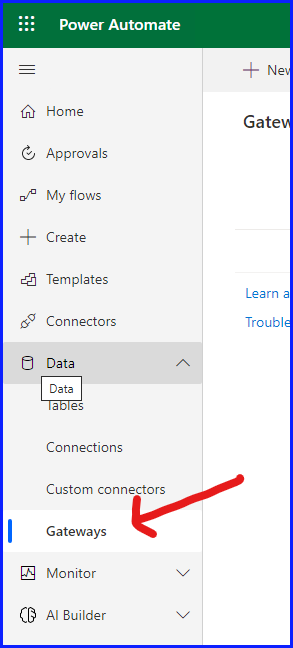
Setting up a Data Gateway in Power Automate is fairly straight forward. Start by going to Data and then Gateways from the main page in Power Automate.
You can also see the step-by-step instructions on YouTube at the link below:
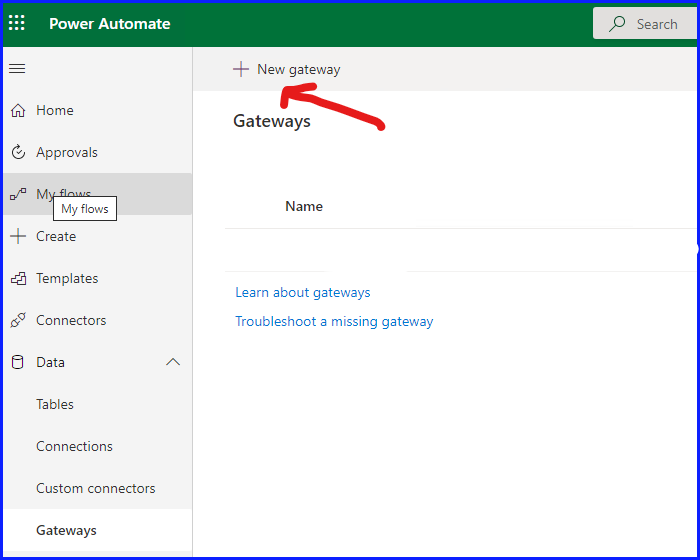
Then select New Gateway
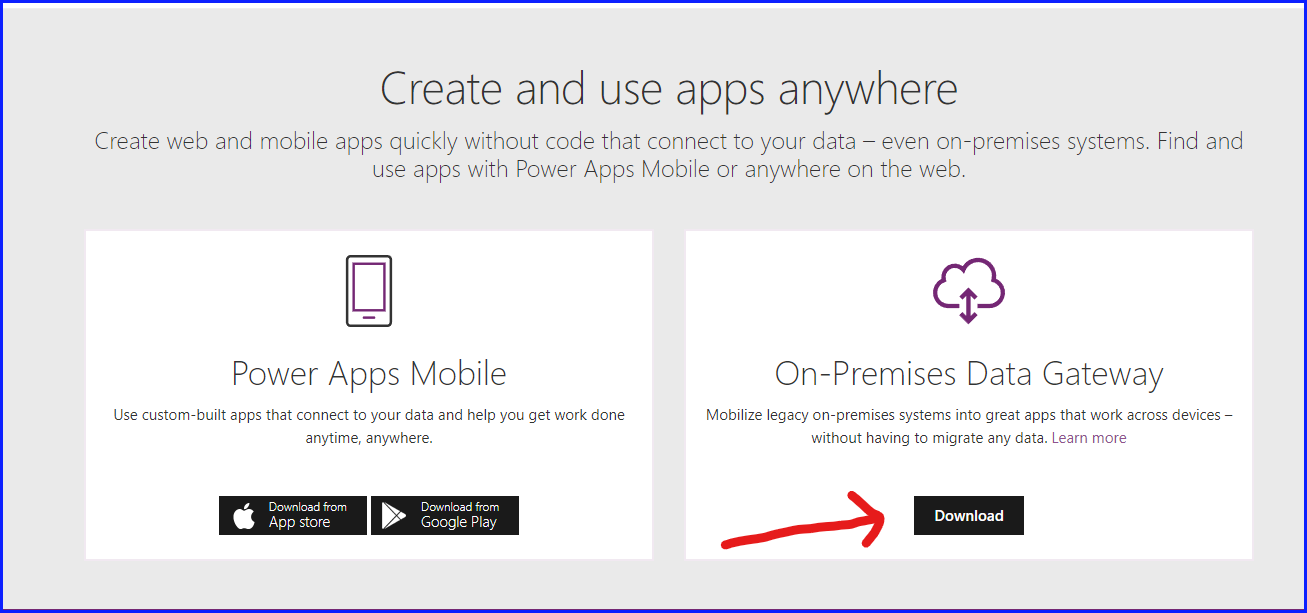
This will take you to an external page to download the On-Premises Data Gateway or click here to download the Gateway.
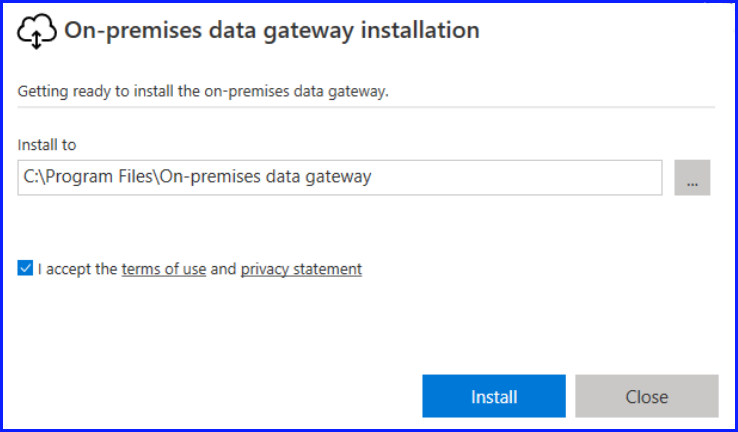
Run the executable after the download is complete and select where the installation should be installed.
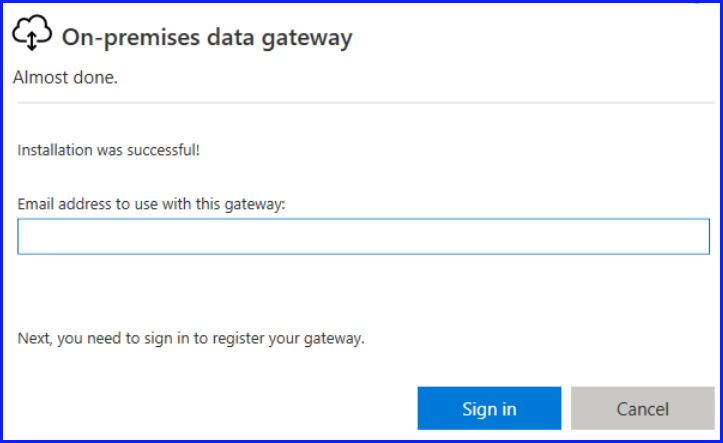
When the installation is complete enter an email address to use with the Gateway.
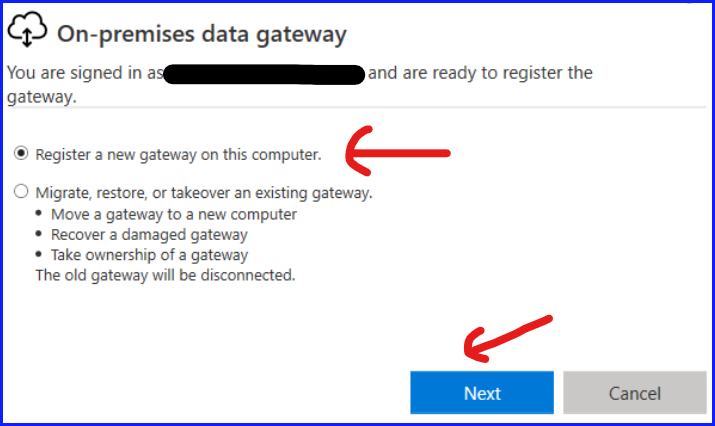
Next step is to register the new Gateway on your computer.
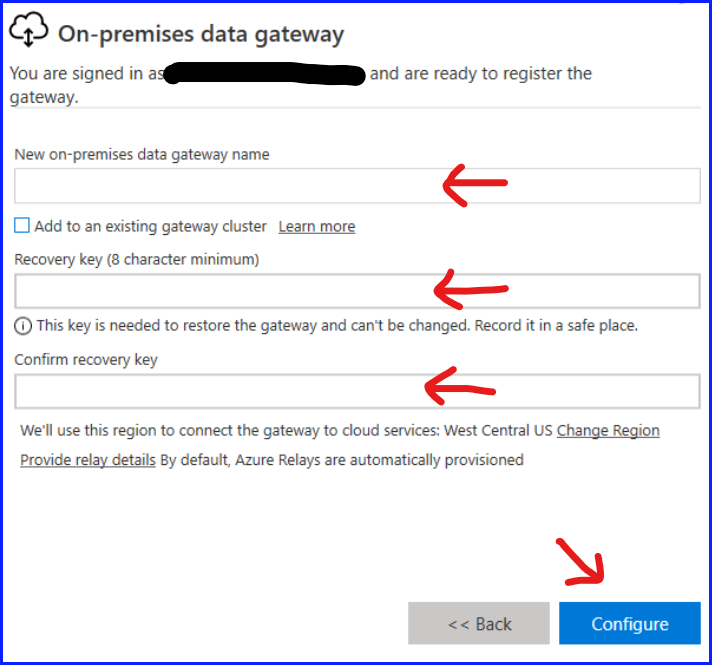
Now you are ready to setup the Gateway.
- Give your Gateway a name
- Provide a recovery key for security purposes in case the Gateway needs to be restored.
- Re-enter the recovery key and select Configure.
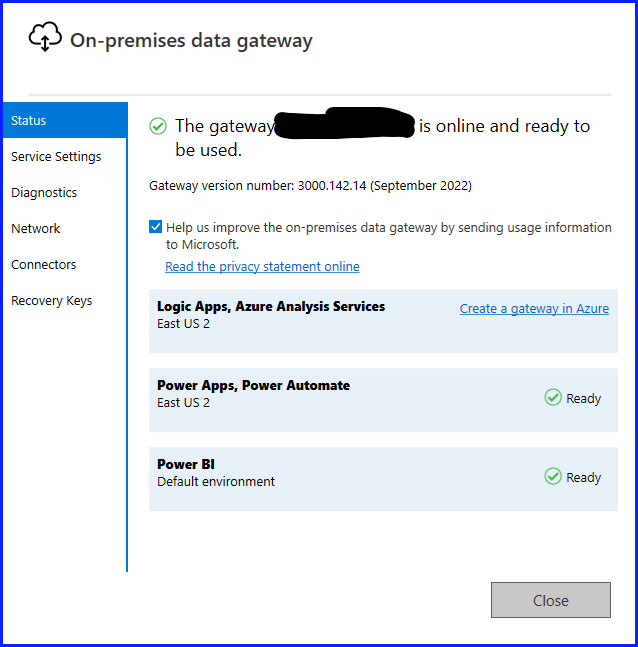
The new Gateway should now be setup on your local computer, and you should see the screen below.