While working at Microsoft I had access to the SQL data from many of the applications used by the Azure Capacity Planning and Supply Chain teams. One of my functions was to track the changes and movement made to capacity (server racks) across time.
To accomplish this, I used Power Query in Excel to link a notes column to inventory line items in SQL Server using self-referencing tables. This allows the notes to stay in sync with each line item after refreshing, filtering, and sorting the data. Let’s take a look at how this is done.
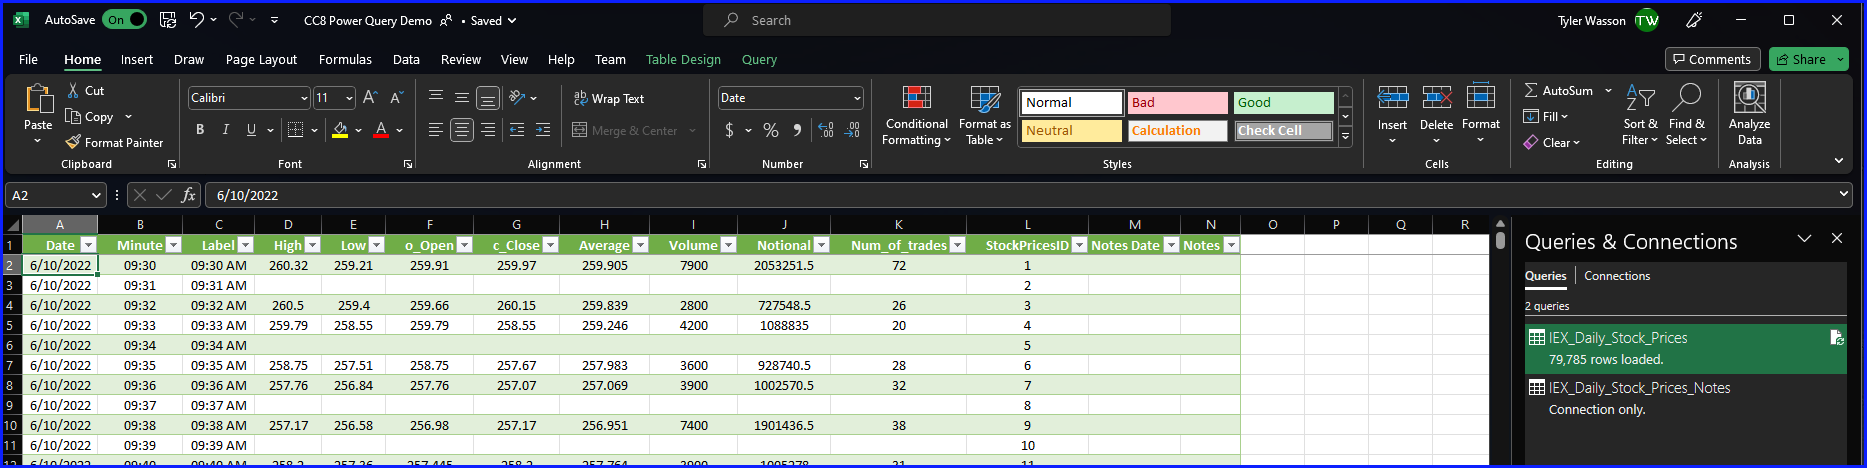
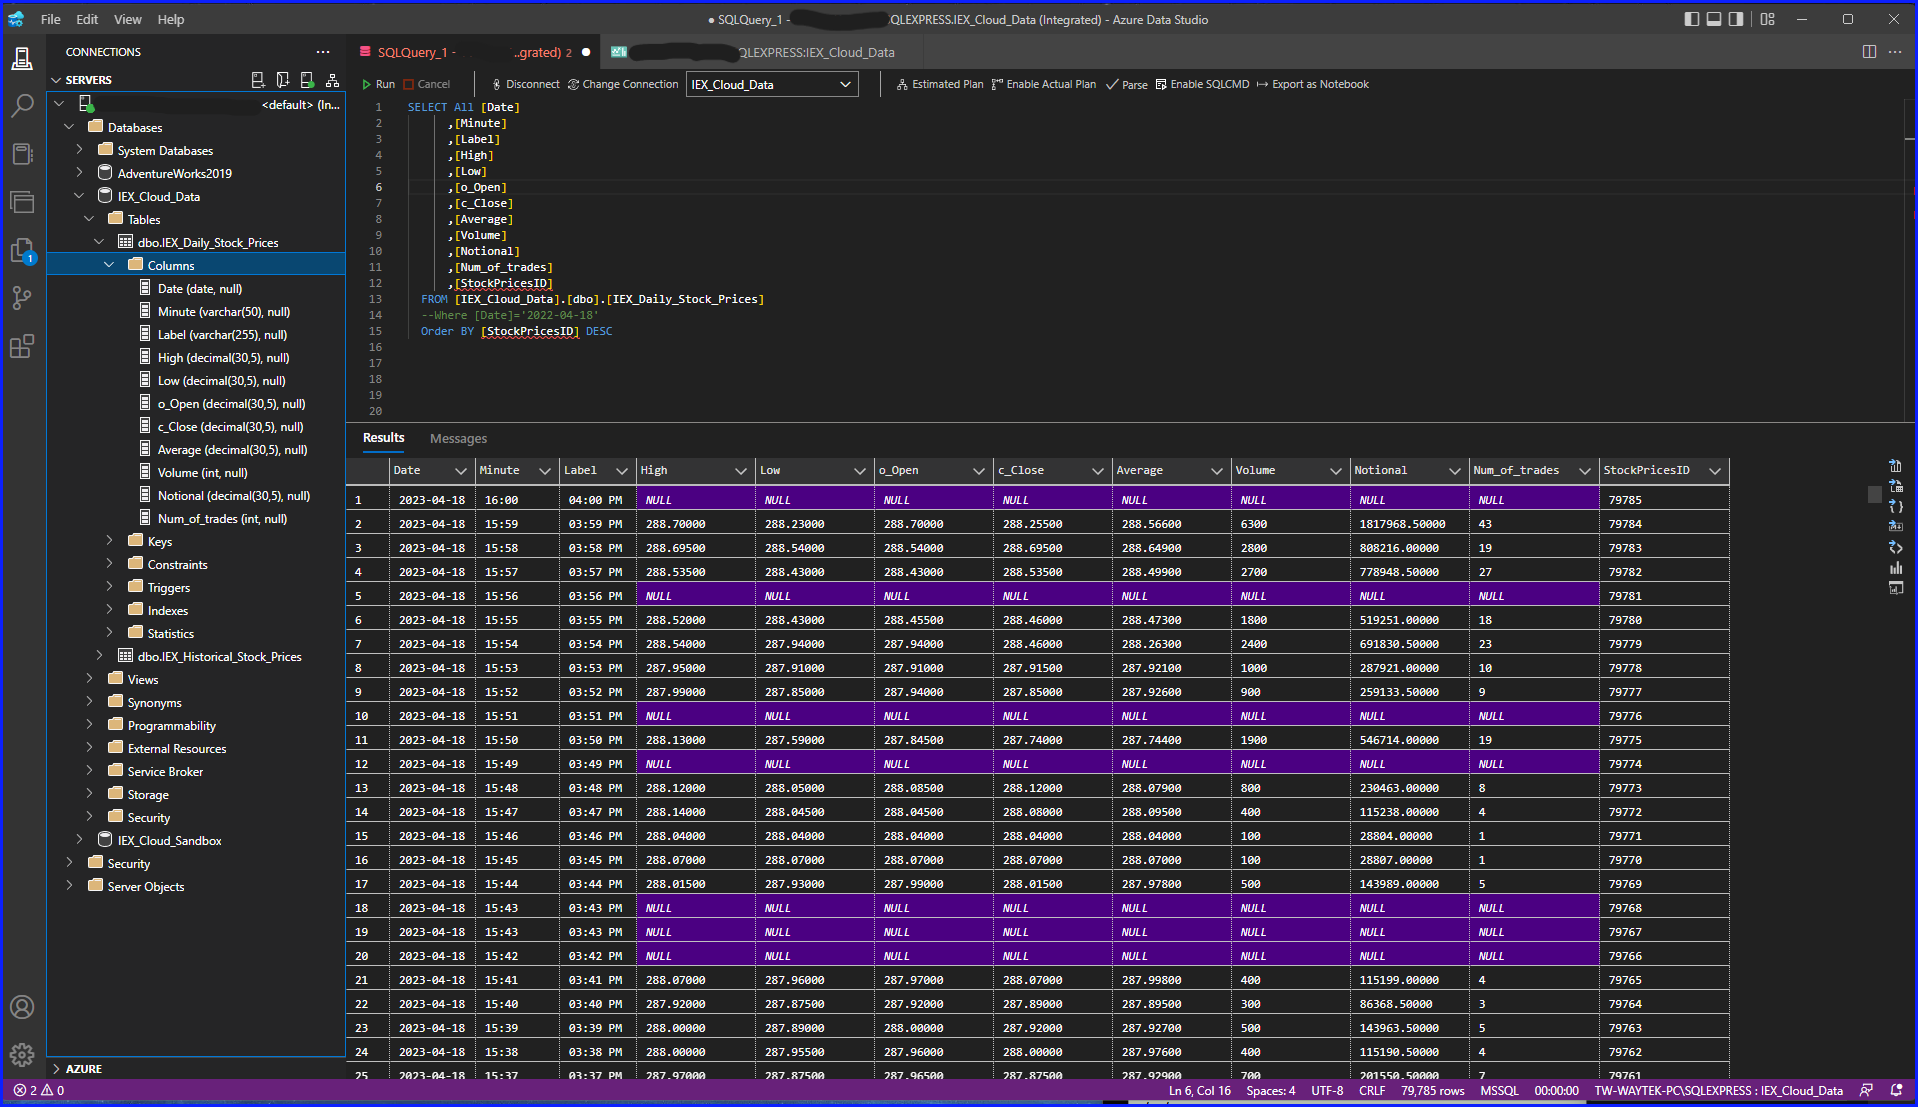
For this example, I’ll be using the IEX_Daily_Stock_Prices table from my IEX_Cloud_Data database to simulate how I set this up. (To see how I receive by-the-minute daily stock prices into this database visit my blog post: Cloud Data Pull Using JSON HTTP Request in Power Automate).
There are a few points to mention before I demonstrate how to set this up:
- Your SQL table needs a primary key or unique identifier field for this work.
- You can add one or more columns to the table in Excel, I’m using 2 in this example.
- This can work with not just SQL Server but with any data type, including another Excel table.
Click on the link below to see the YouTube video of this blog post:
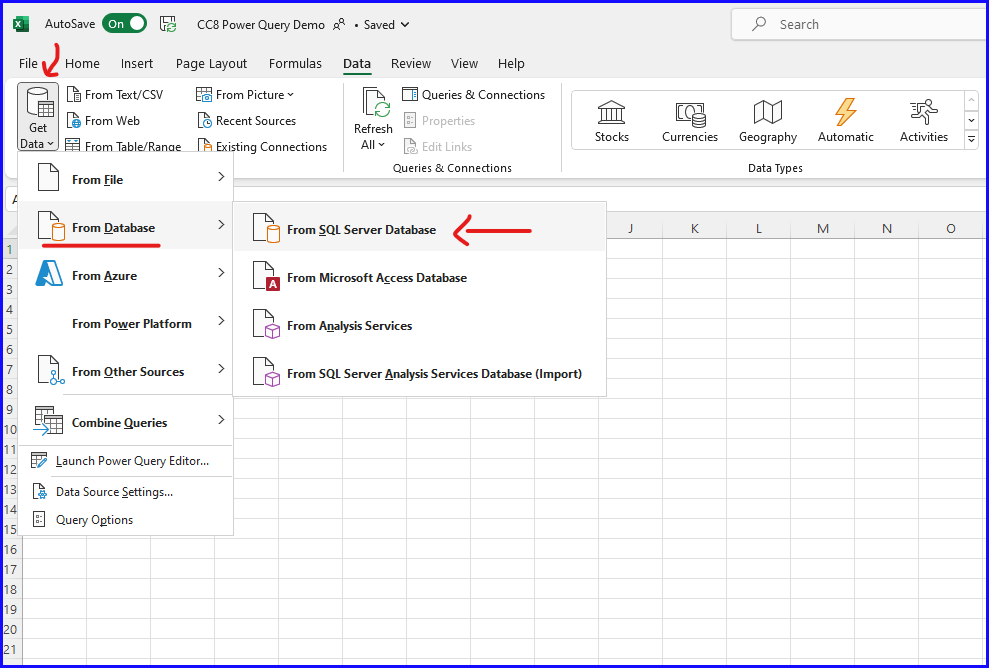
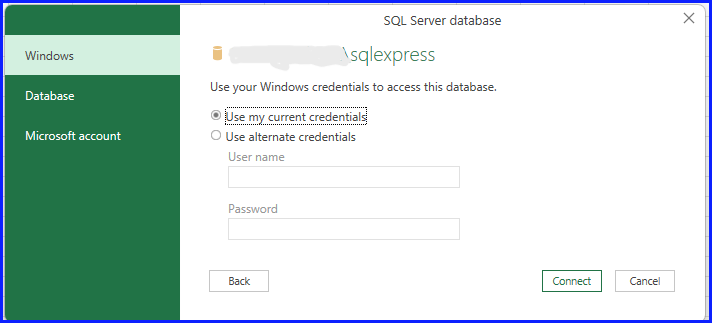
First step is to connect Excel to SQL Server by going to Excel–>Get Data–>From Database–>From SQL Server Database.
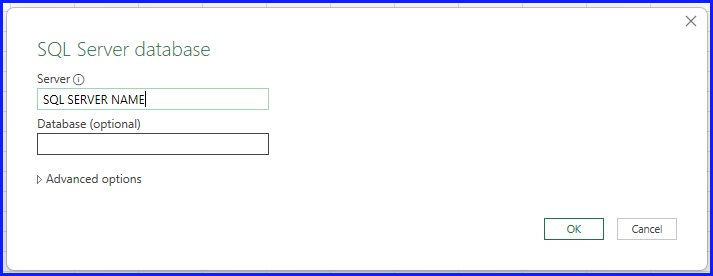
Next are the remaining steps connecting Excel to SQL Server.
- Select your SQL Server, for this example I’m using a local server, but you can also connect to a cloud hosted server.
- Provide your credentials to the SQL Server.
- Select the table to link to from the database and click “Connect“.
- You should now see the SQL table in Excel.

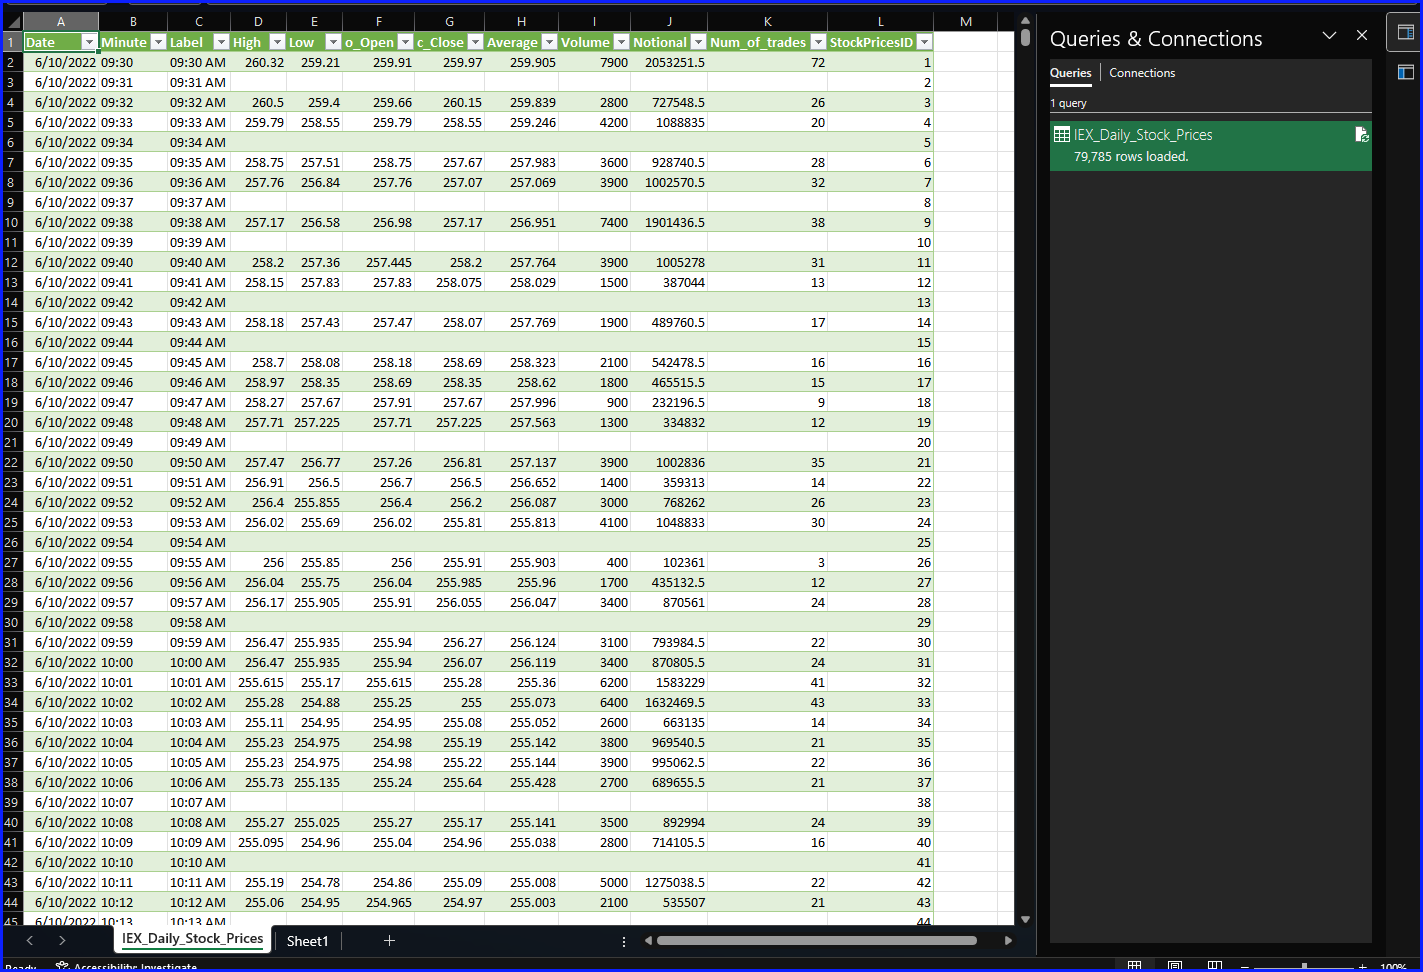
Next step is to add columns to the Excel table. I’m adding two additional columns as an example named “Notes Date” and Notes”, but you can add as many columns as you’d like. Just type in a header name for the column next to the last column in the table to create the new column.

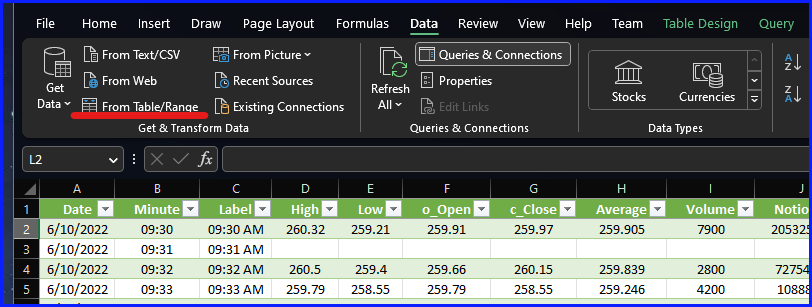
Then go to the ribbon, select Data–>From Table/Range. This will open up the Power Query Editor.
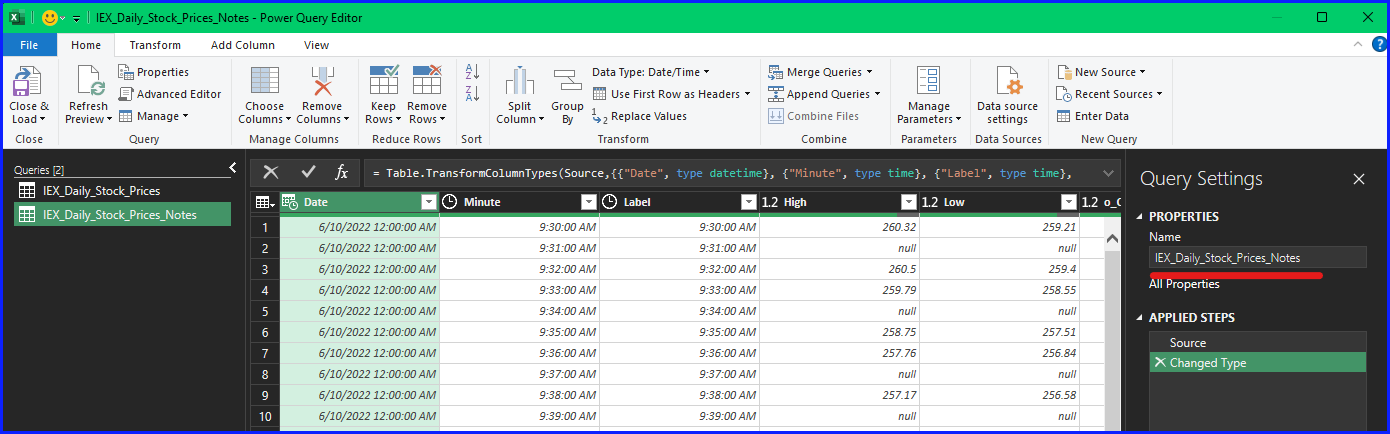
I like to rename the new table as the same as the original but with a “_Notes” at the end to easily identify the two going forward. You can do this under Query Settings Properties shown below underlined in red.
Then go to the ribbon and select Close & Load–>Close & Load To.
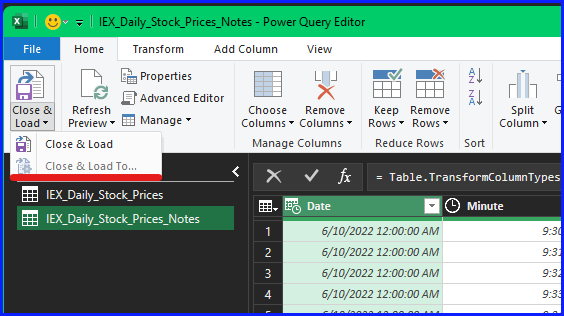
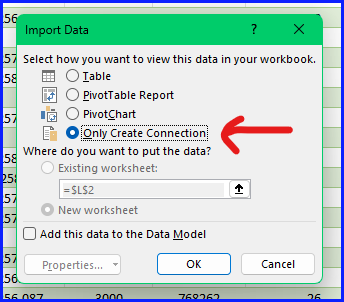
Next select “Only Create Connection” and click on “OK“. This will bring you back to the main table.
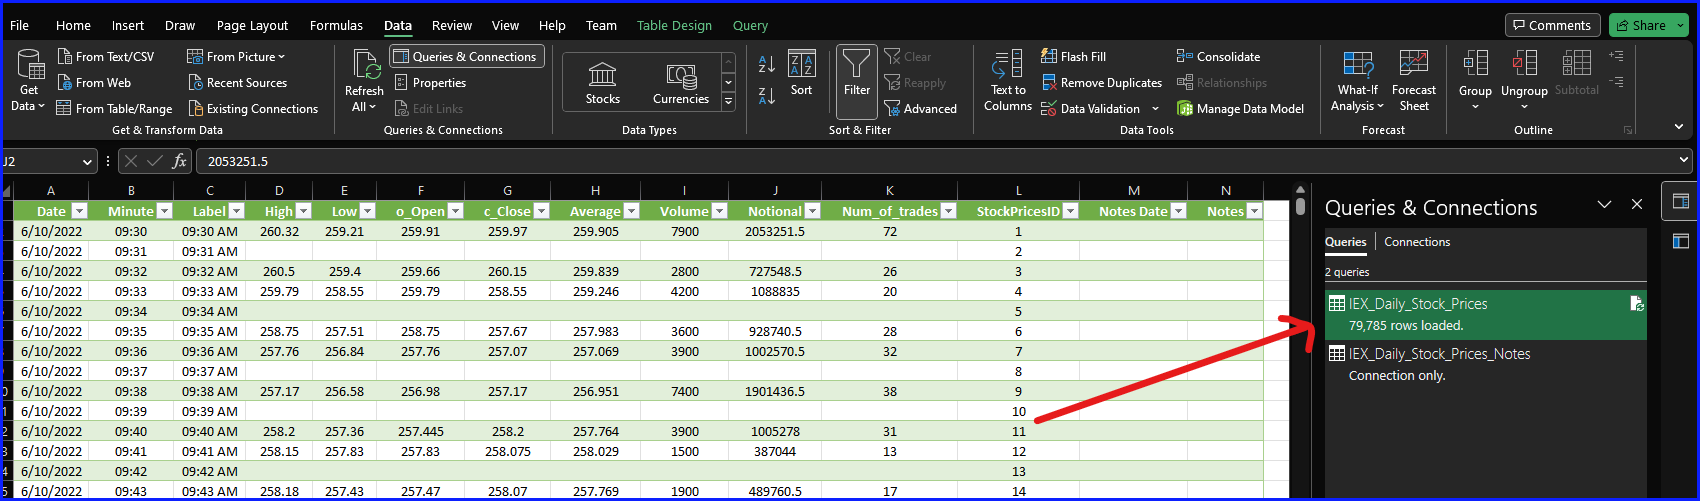
You should now see two query connections, with one stating “Connection Only”. Next you want to edit the main table, the non-Connection-Only table by right clicking on it in the Queries & Connection pane. This will bring you back to the Power Query Editor.
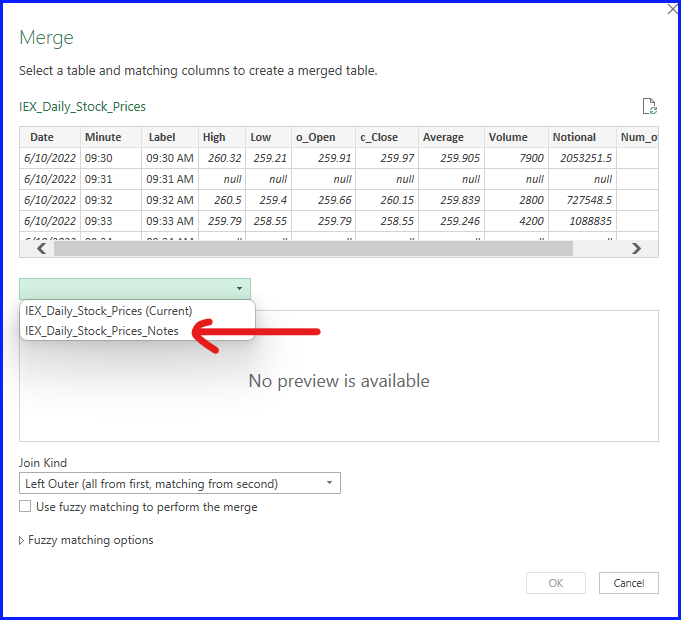
From within the ribbon, click on “Merge Queries“. This will open the Merge Queries window.
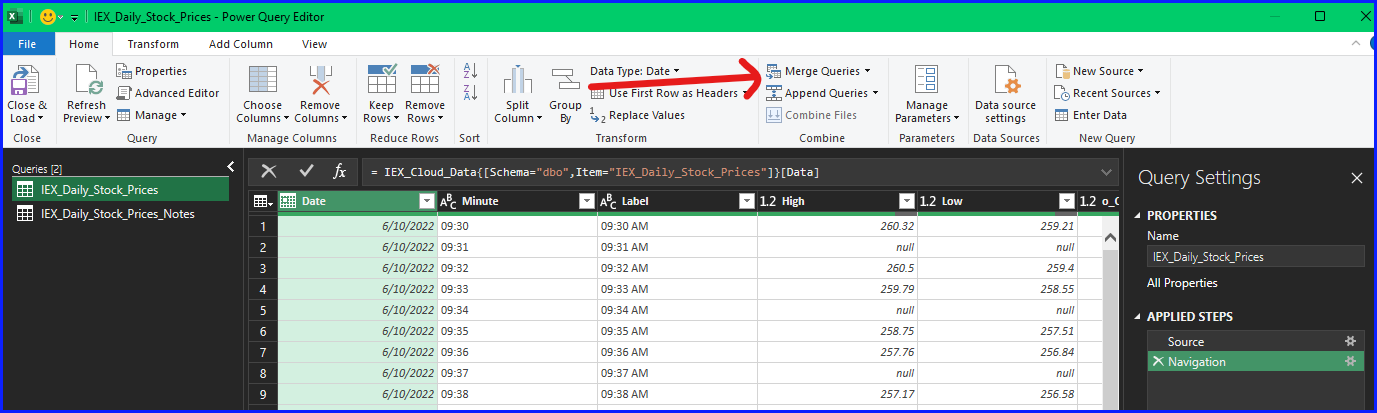
In the drop-down menu select the Notes table. This will add the columns in the preview window underneath it.
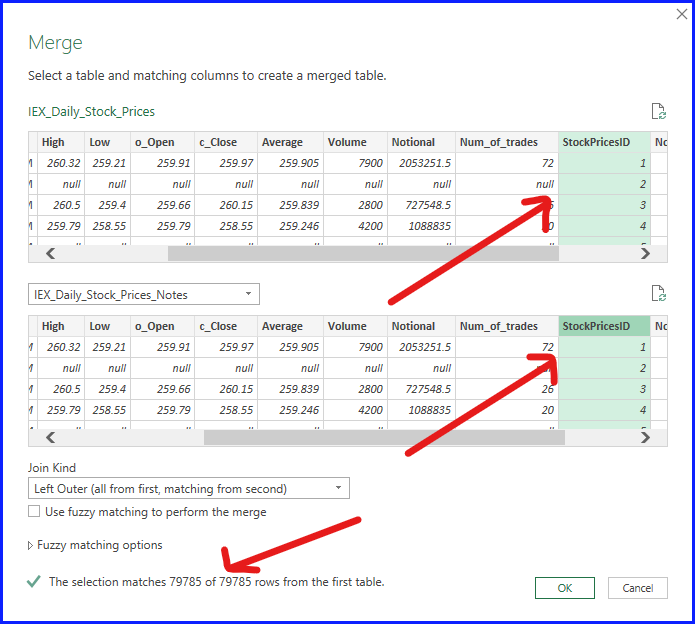
This is where the primary key or unique identifier is required. Select it in each table as shown below. You should see the selections match at the bottom of the window. Then click “OK“.
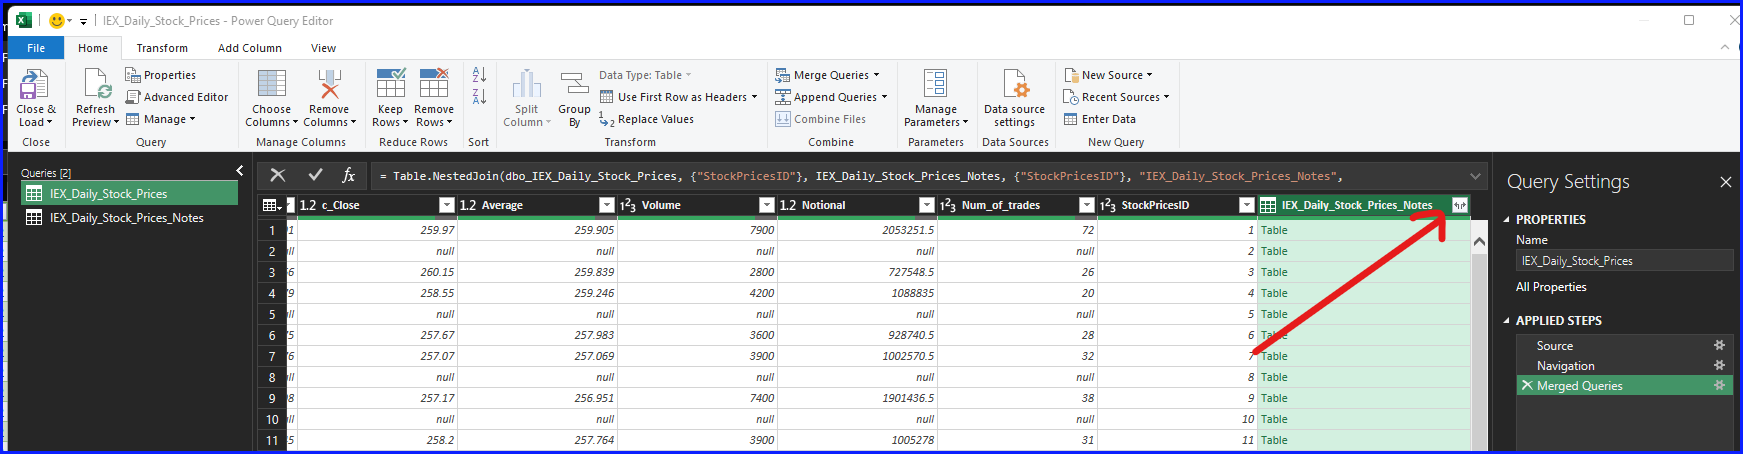
This brings you back to the Power Query Editor window, scroll all the way to the right where you will see a new column in your query. Next select the button in the upper right with the double arrows pointing in the opposite direction.
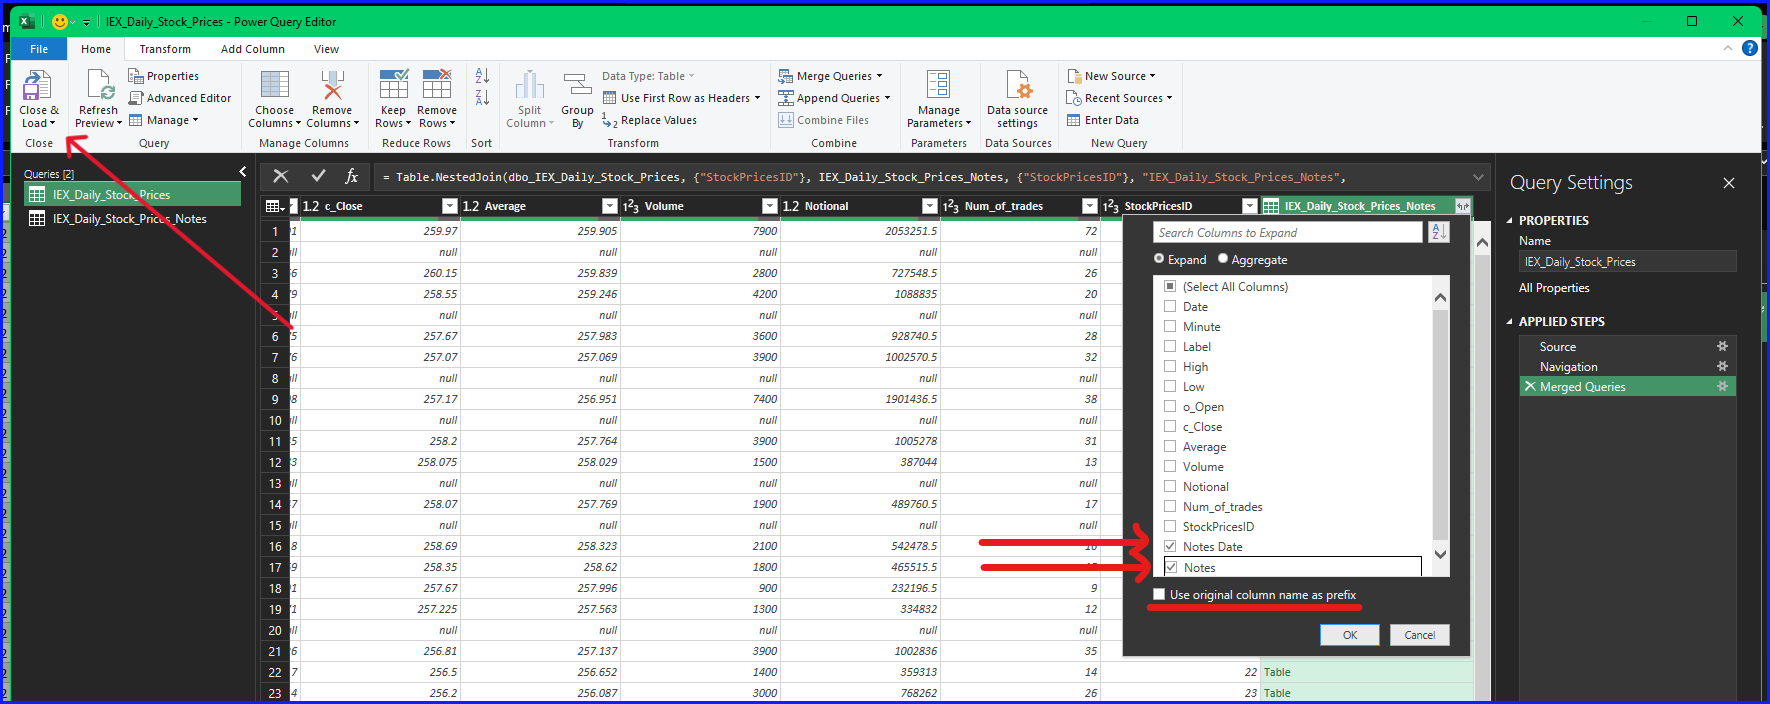
This opens a drop-down menu, unselect all of the columns except for the new column(s) you added. It will be the last column(s) on your list depending on how many columns you added. Then uncheck the “Use original column name as prefix“. Then select “OK“, you should then see the column expand into the number of columns you added. Lastly, go to the ribbon, under the Home tab, and select “Close & Load“. This will bring you back to the main table.
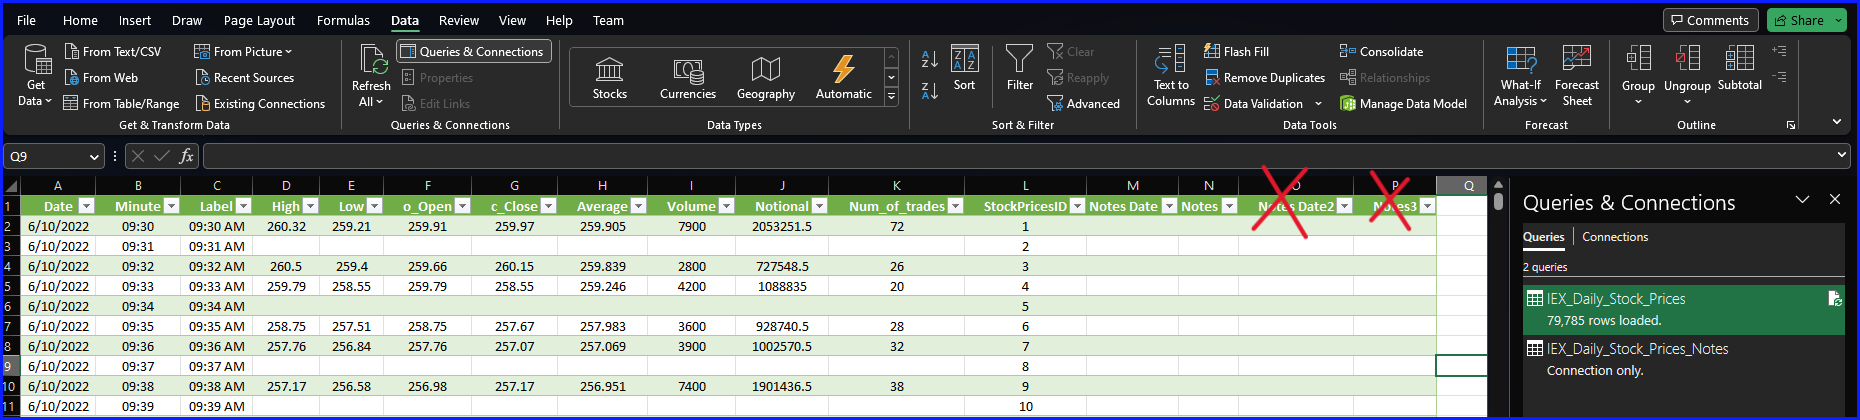
You will see next to your added column(s), the duplicate of each. Go ahead and delete each of the newly added duplicate columns.
That’s it, you are now ready to add notes or any other reference information for each line item in the table. You can refresh, sort, and filter the data without worry of having your table out of sync with your reference data.